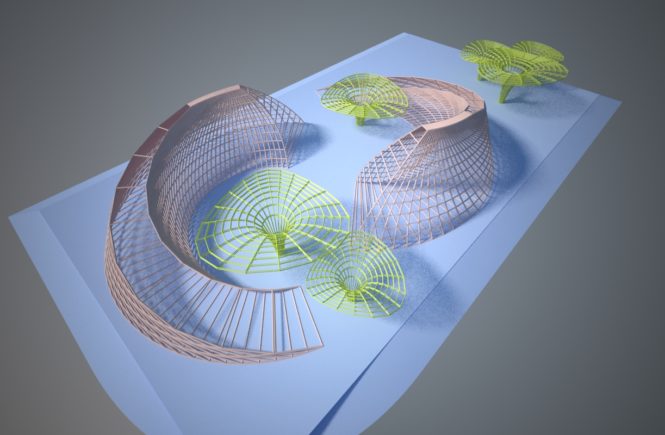
There is something about how fishes swim around each other in the symbol of Yin and Yang. Although I have never observed this in nature, it has been well observed that fishes swim in groups and that they often swim about in ever changing direction.In my road to improving my skills in conceptual presentation, I explored the form of the Pisces as a concept art.
It started out as a concept model on 3d max.
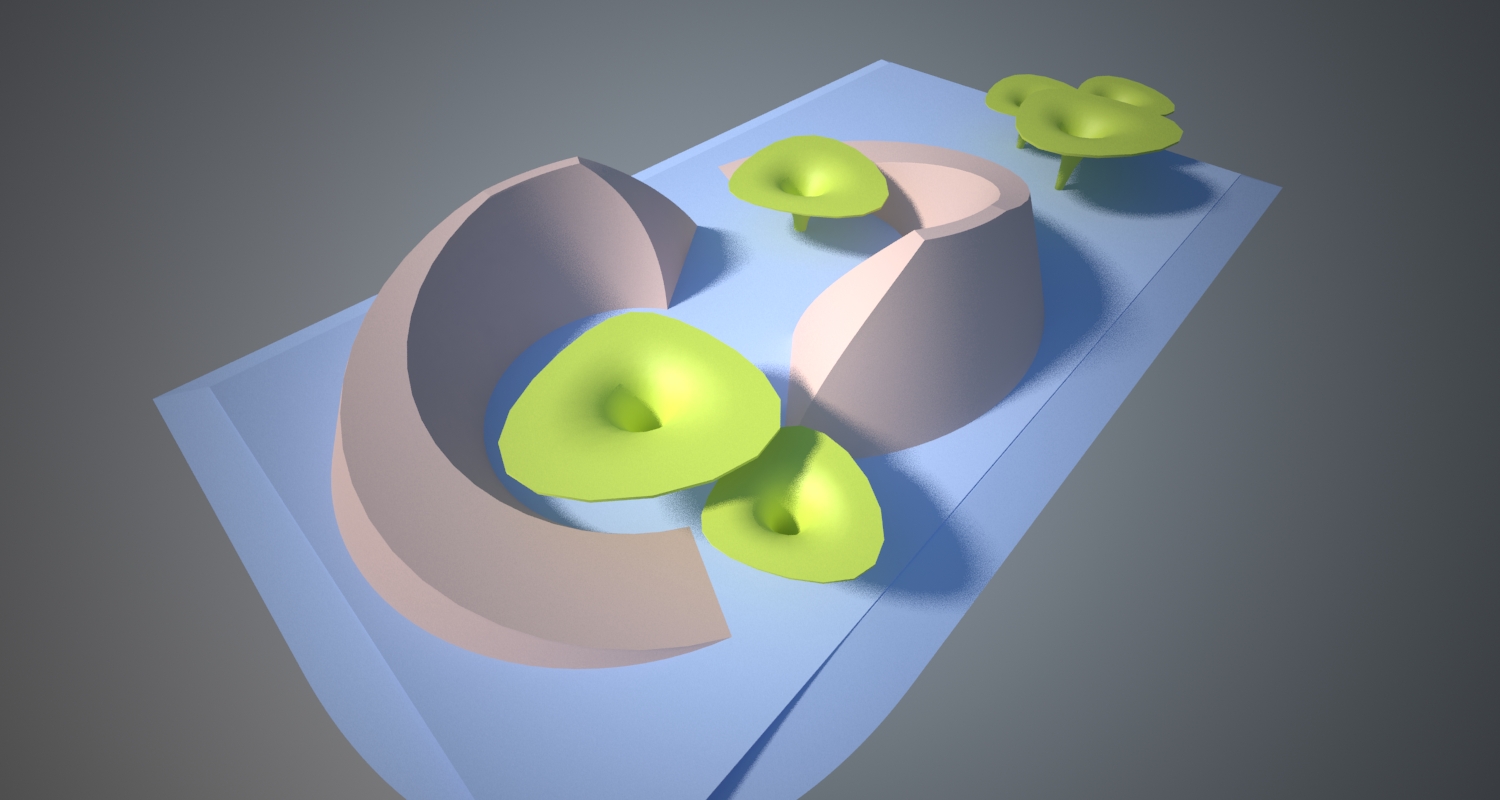
later on, I added a few lillies and changed the colors around to better reflect the story. The base shape is now showing two fishes swimming about in a pond with water lillies around them.
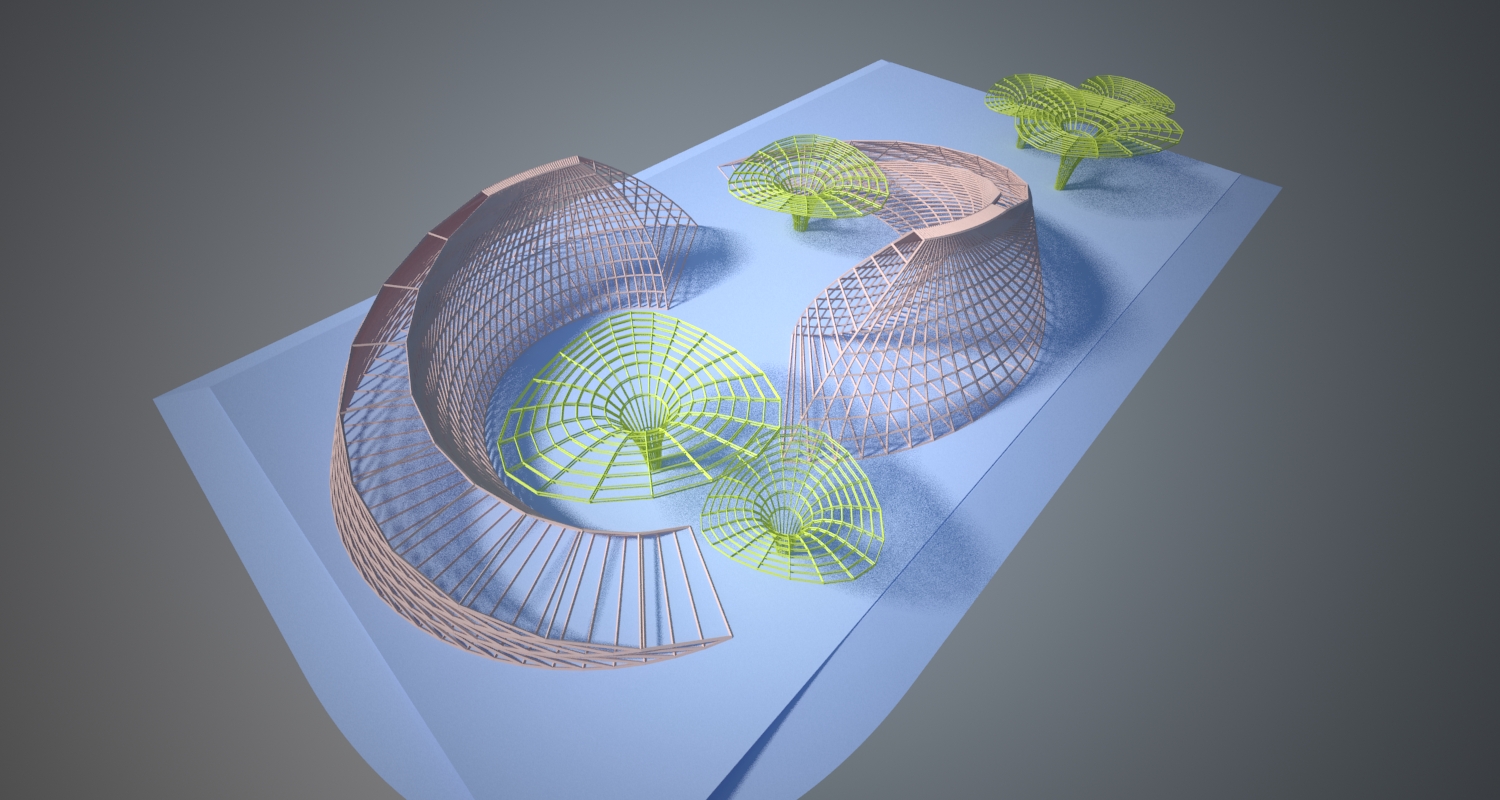
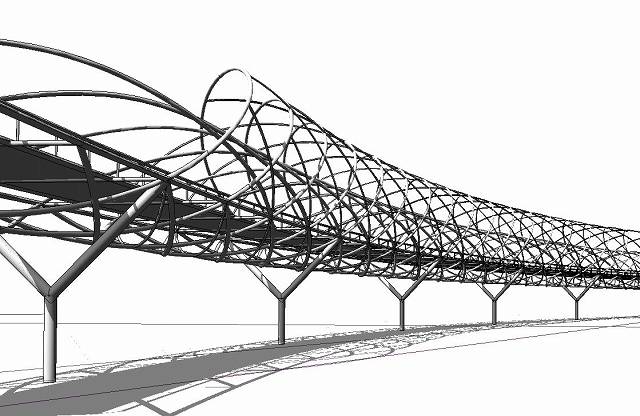
This later evolved into a latticed version where it can be constructed with frames and frames of timber or steel members.
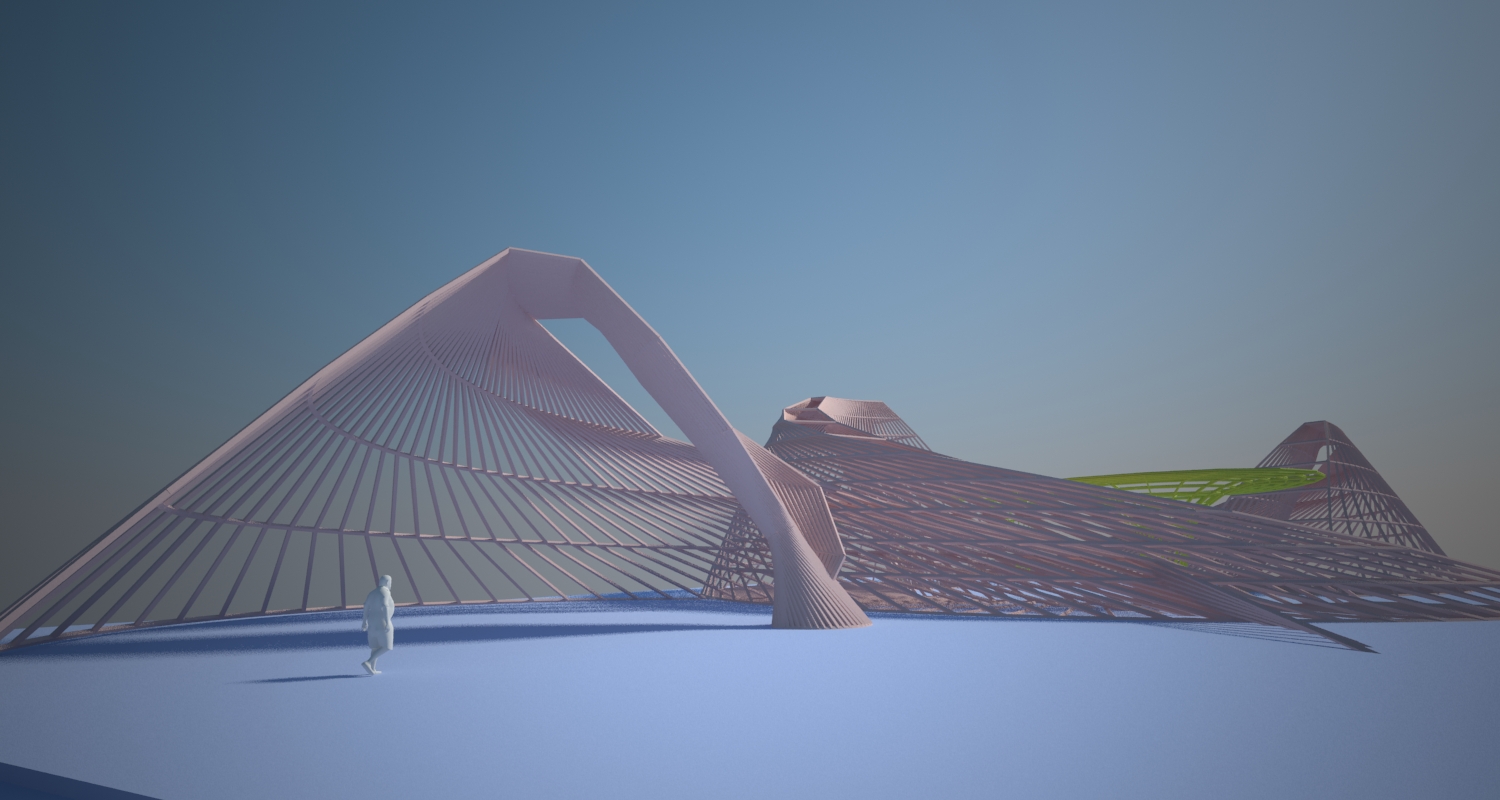
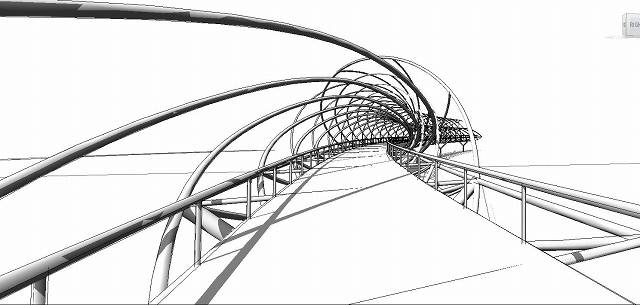
and finally, a mans eye view of this pavillion concept art.
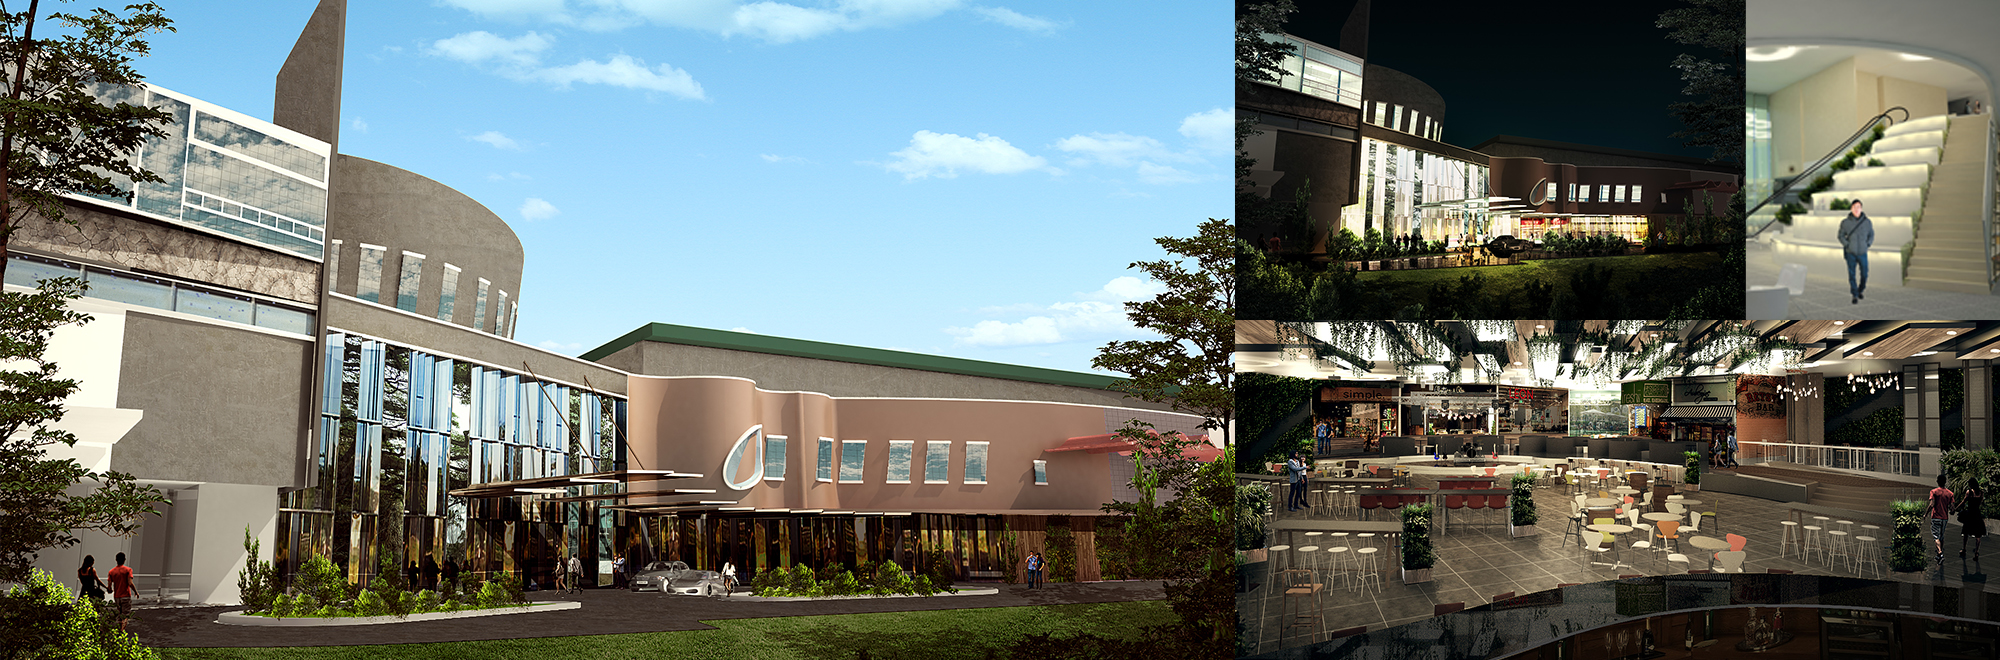
There is a sense of ubiquity when it comes to 3d rendering. Almost everyone, and every firm can produce renders these days using sketchup, revit, or Max.
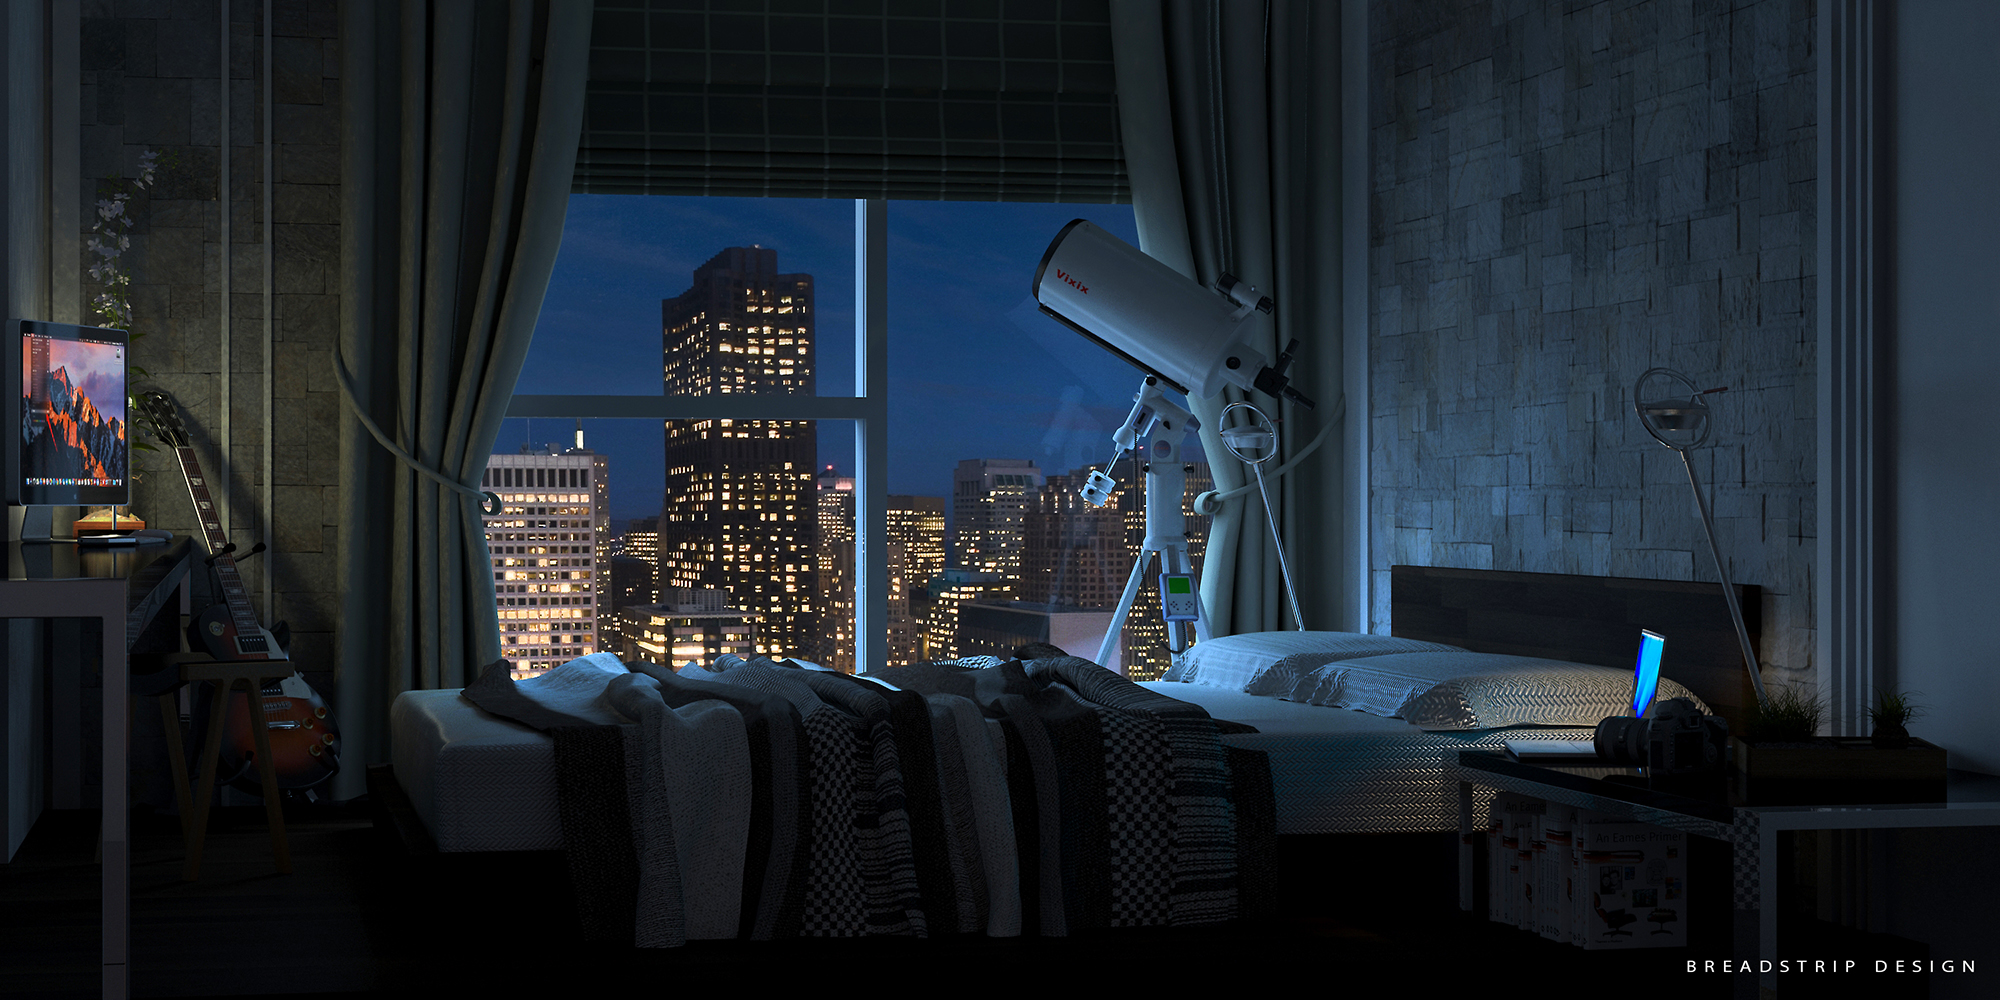
I have always been a “render raw, photoshop the rest” kind of illustrator. But for now, Im trying to sink my teeth into full render mode. I am experimenting with texture mapping, Atmospherics, and creating elements like grass and nature.
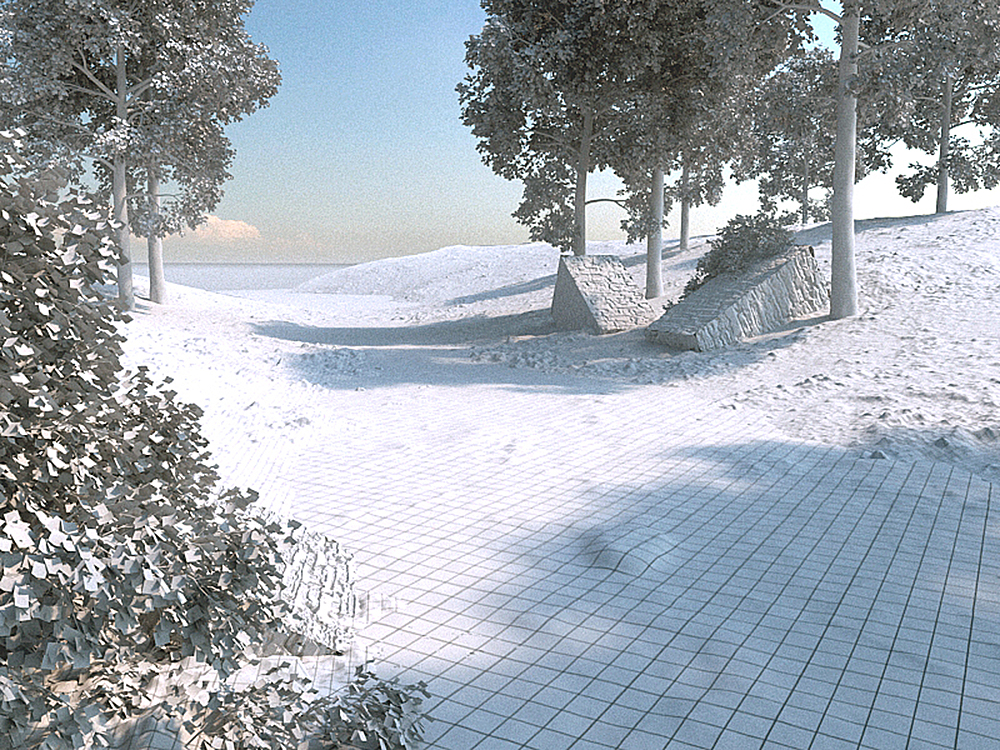
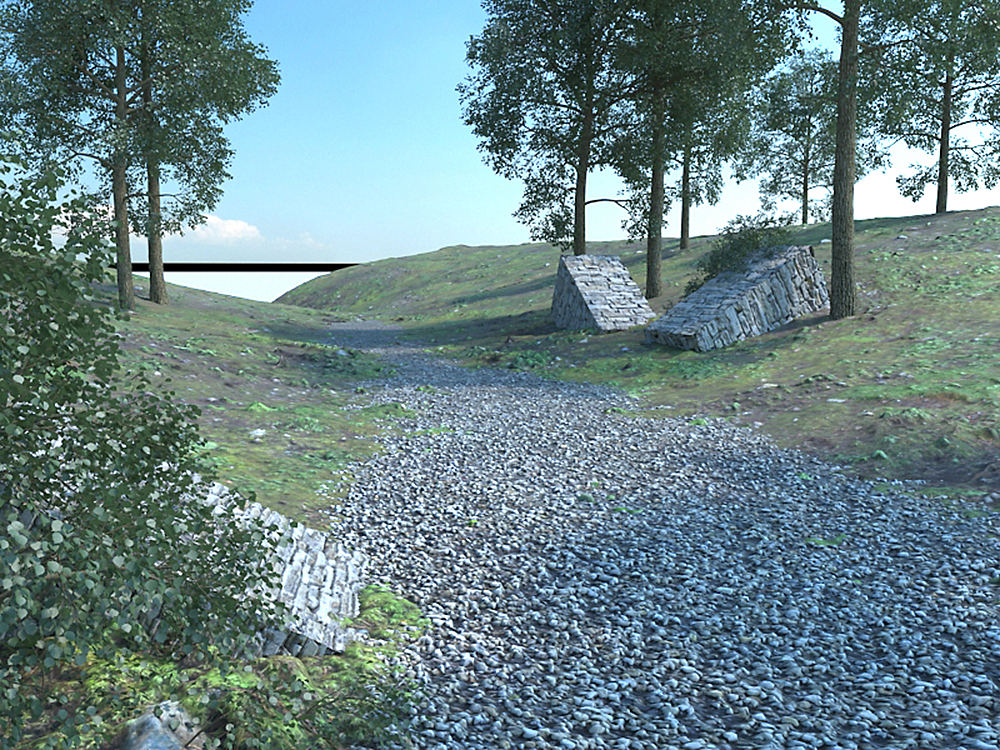
The first step is to model the scene and get the light right:
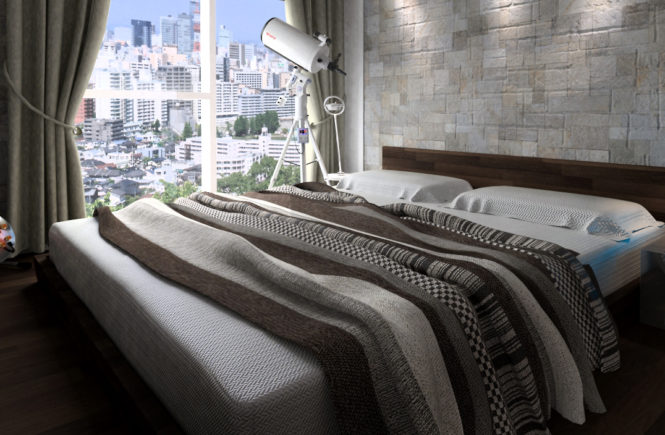
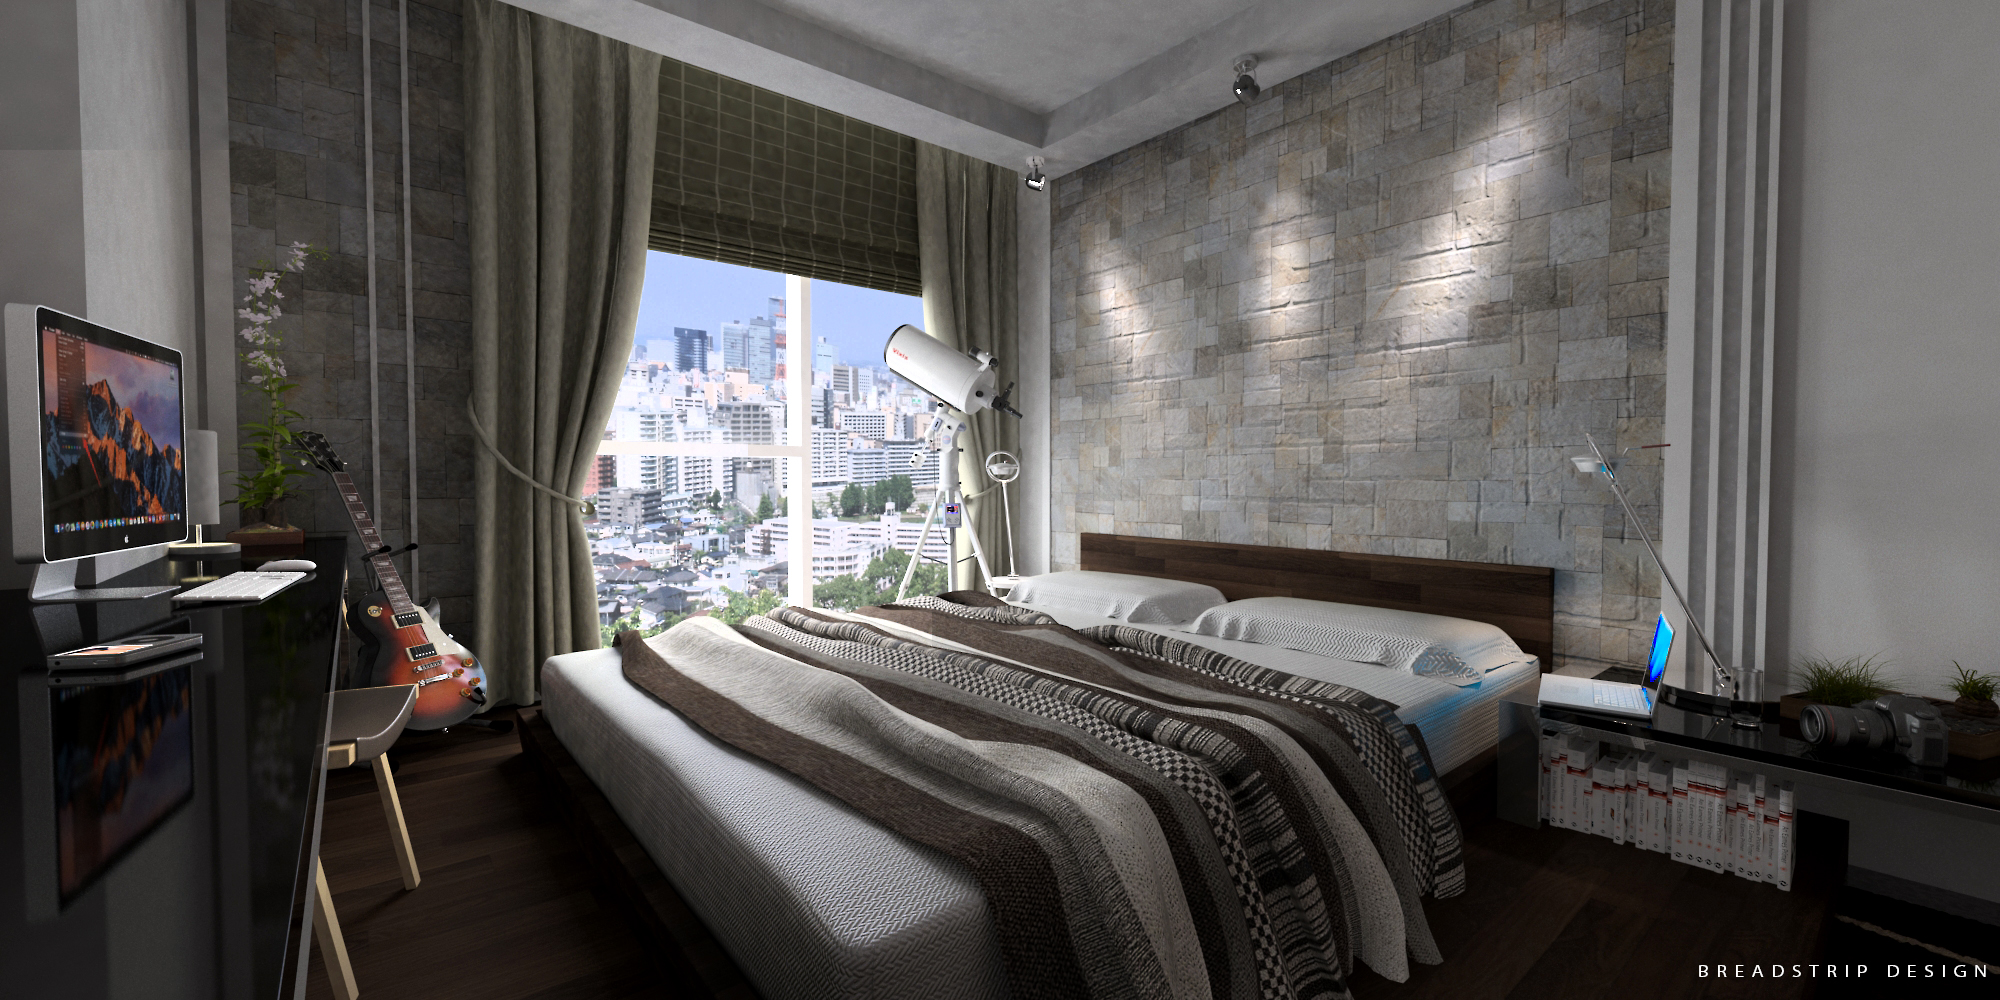
I then added texture maps, bumps and displacements to create the scene:
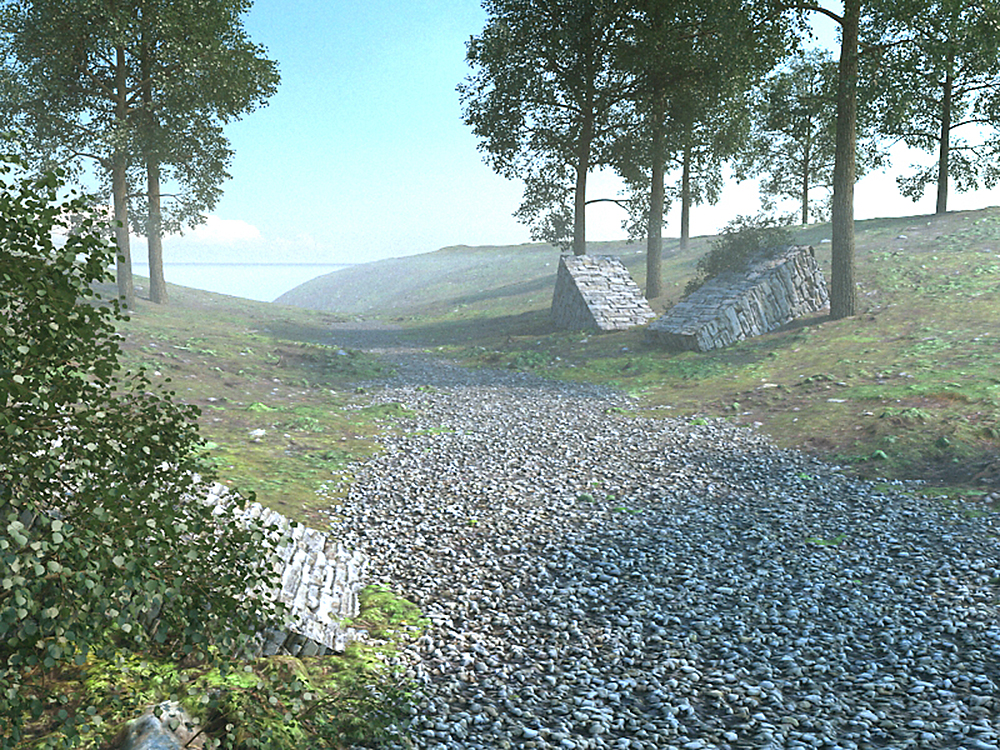
To create depth, I rendered fog using Vray environmental fog in 3ds max
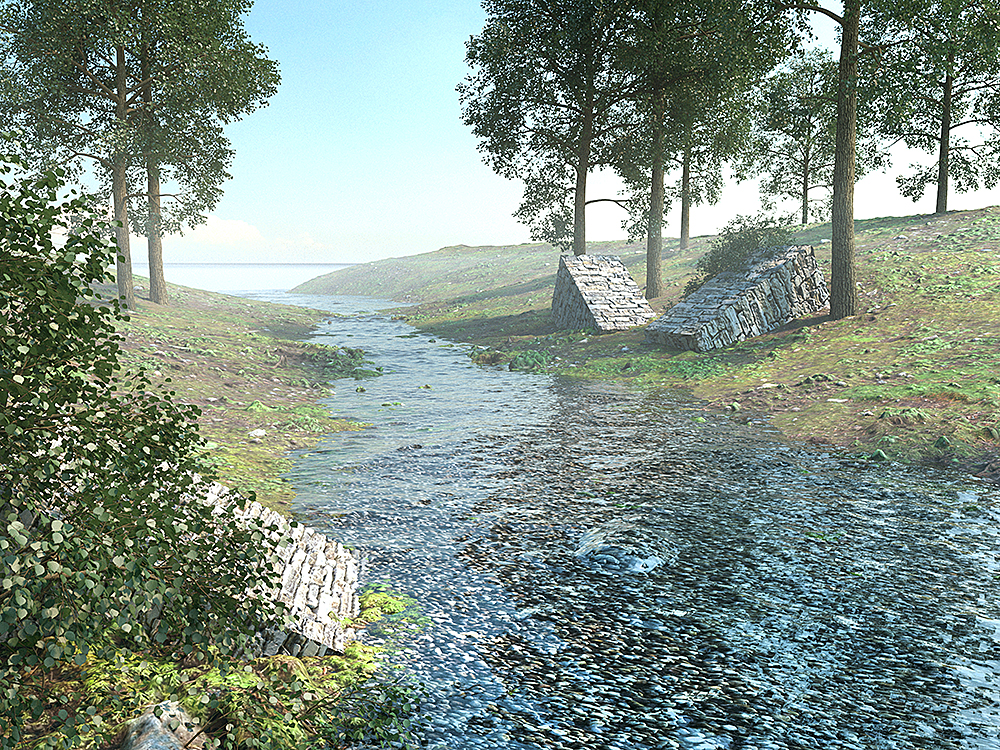
Added water body with displacement and reflection to complete the image.
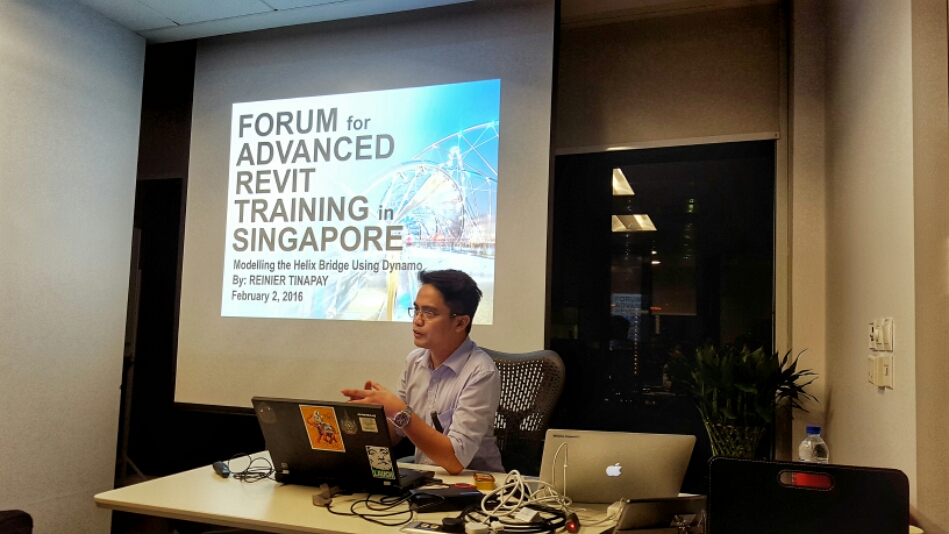
Speaking Engagement : Forum for Advanced Revit Training in Singapore
So I got invited by Forum for Advanced Revit Training in Singapore, and Autodesk to give a talk about my Helix Bridge project that I did entirely in Dynamo. The forum was packed. With a myriad of people in attendance (engineers, architects, developers, and IT professionals from Singapore and guests from US) it was a very successful event. One of the guests was none other than Zach Kron, the guy who gave us the bridge tutorial that most of us probably took as our launchpad in learning dynamo.
Thank you Phil of bimtroublemaker and Autodesk for the invitation to be the guest speaker for this awesome forum.
Im also sharing the powerpoint and dynamo files used during the presentation. Just Click on the download link below.
you can also get the powerpoint here
and the dynamo file here
Lately, Ive taken a penchant for doodling and quick sketching. It has been so long since I last tried to draw anything, and since the last sketch I did for my previous post, Ive taken a habit of sketching everytime I have free time.
This post will be dedicated to all my quick sketches which I will compile from time to time. This is in a way, a means to document my journey to learn sketching and impressions.
IMPRESSIONS : STREETS AND HOUSES (coloured)
-a sketch on old houses and streets inspired by santorini
-sketched in 120gsm paper using Uniball Signo.
-Colored with tombow
-27 July2018
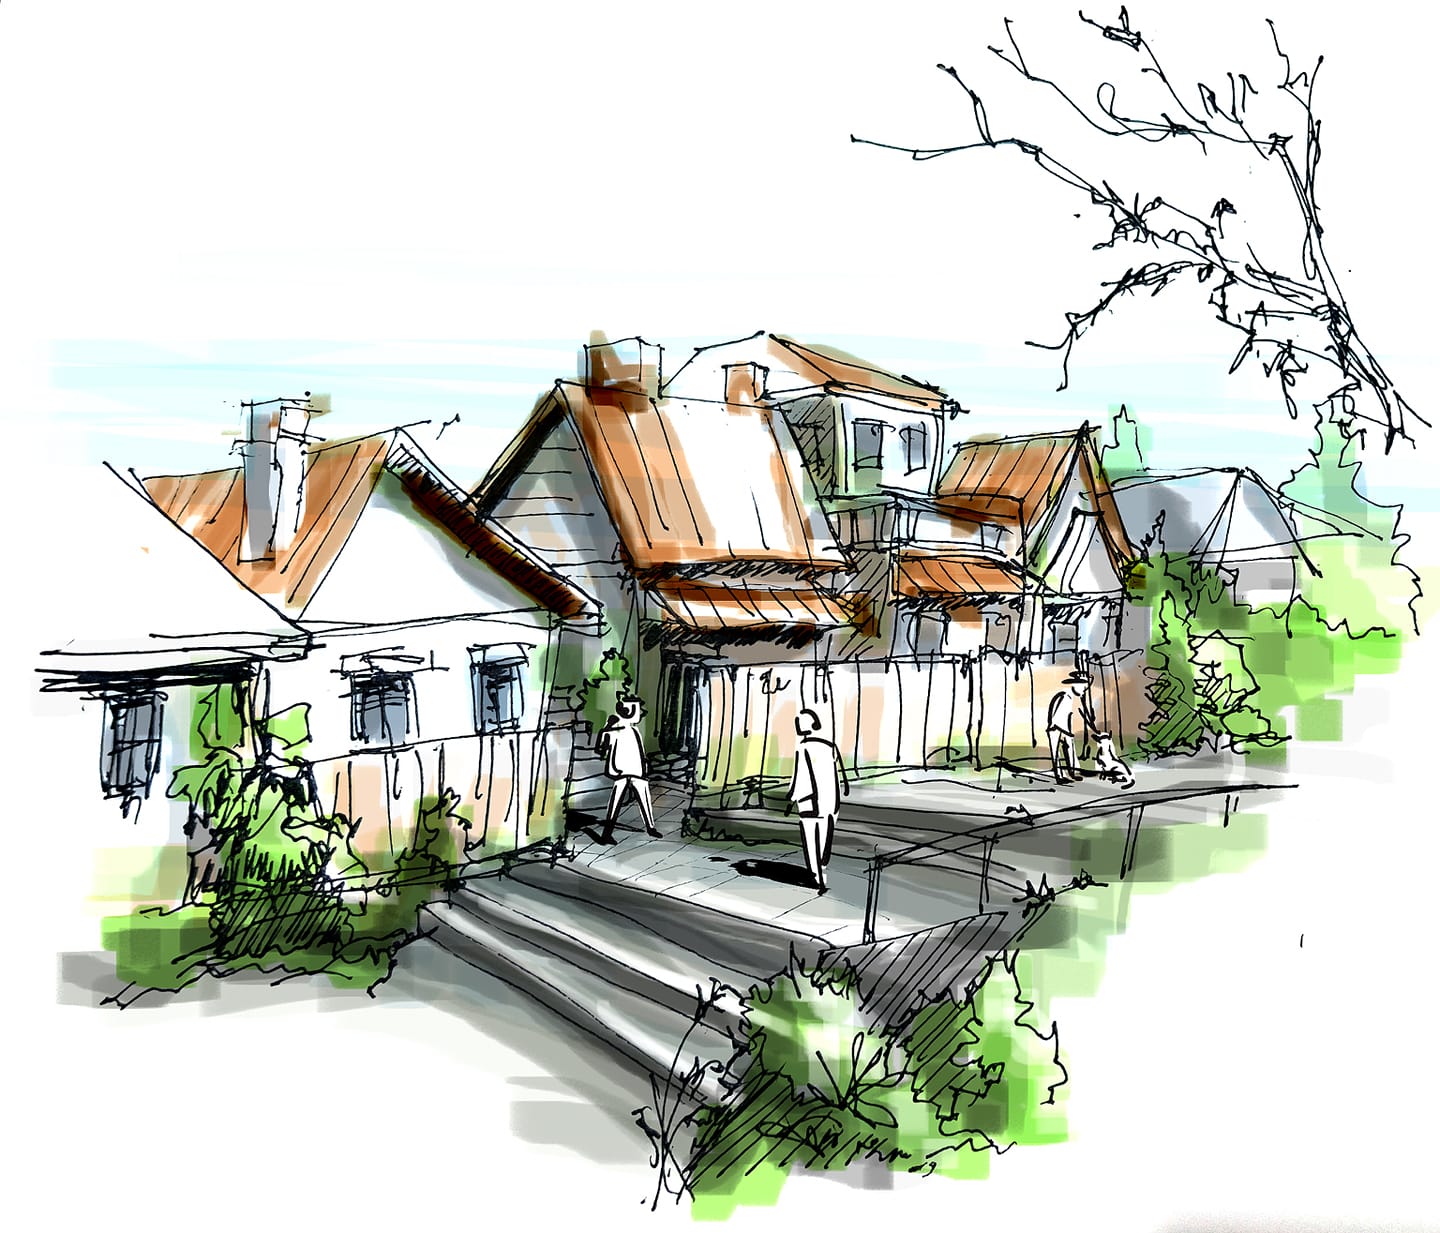
IMPRESSIONS : STREETS AND HOUSES (coloured)
-a sketch on old houses and streets, kampung style
-sketched in 120gsm paper using Uniball Signo.
-Colored in photoshop
-27 July2018
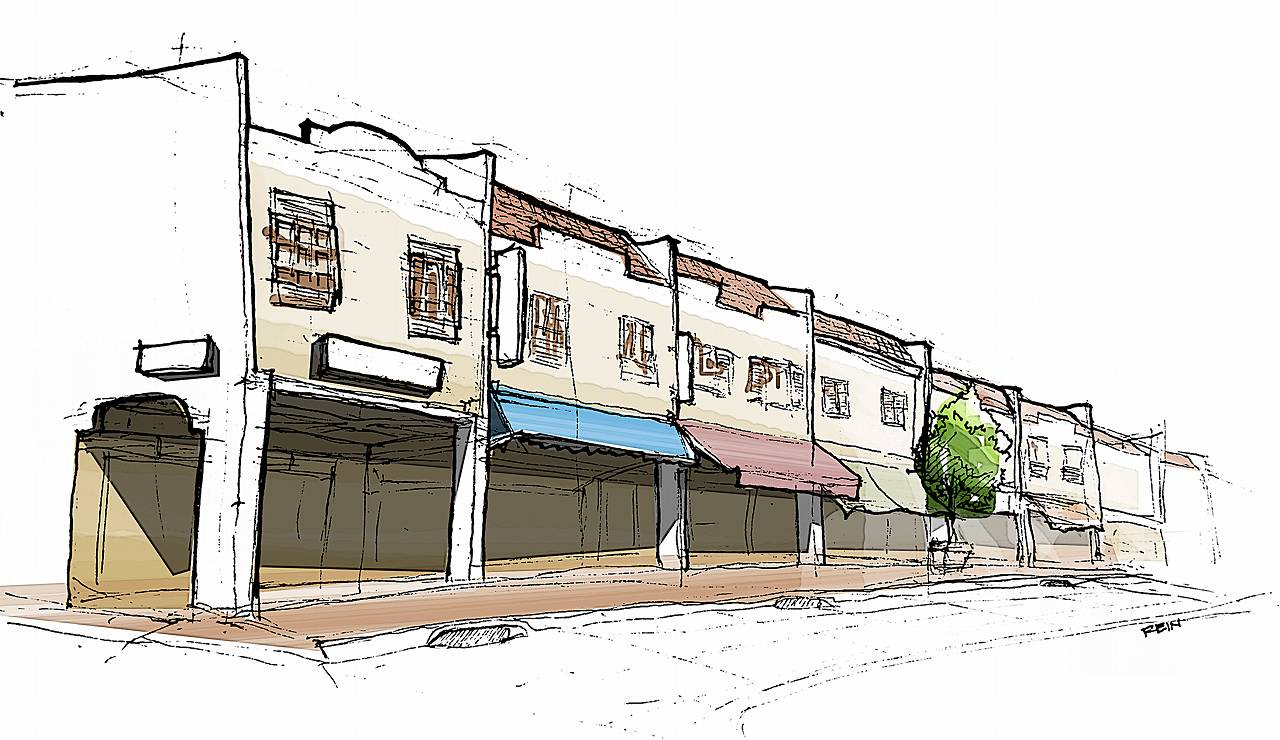
IMPRESSIONS : SHOP HOUSES (coloured)
-a sketch on how shop houses in singapore look like
-sketched in 120gsm paper using 0.2, 0.4 and 0.8 uni felt tip pens.
-Colored in photoshop
-17nov2015
IMPRESSIONS : SHOP HOUSES
-a sketch on how shop houses in singapore look like
-sketched in 120gsm paper using 0.2, 0.4 and 0.8 uni felt tip pens.
-17nov2015
IMPRESSIONS : FOOD STREET AT CHINATOWN
-a very rough 10min sketch of chinatown food street.
-sketched in 120gsm paper using 0.2, 0.4 and 0.8 uni felt tip pens.
-colored in Photoshop
-16nov2015
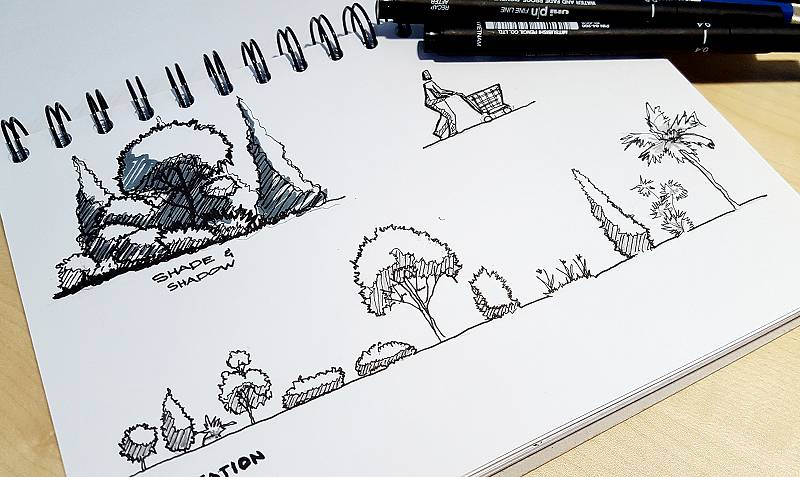
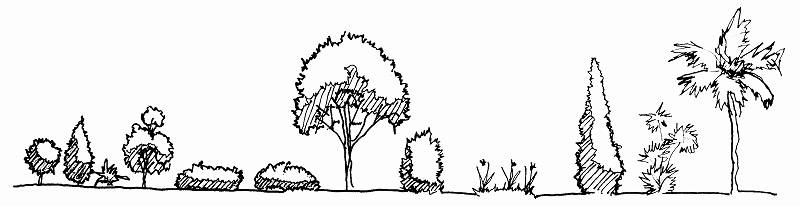
ENTOURAGE: TREES AND VEGETATION
-sketched in 120gsm paper using 0.2, 0.4 and 0.8 uni felt tip pens.
-15nov2015
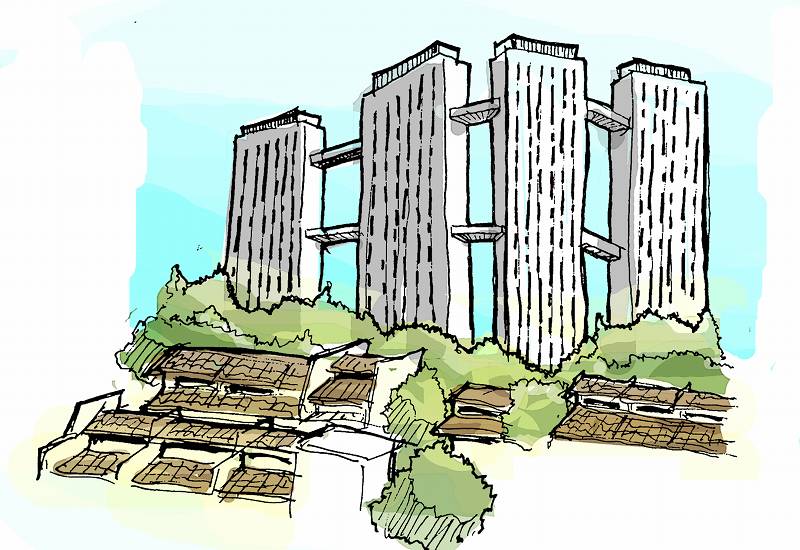
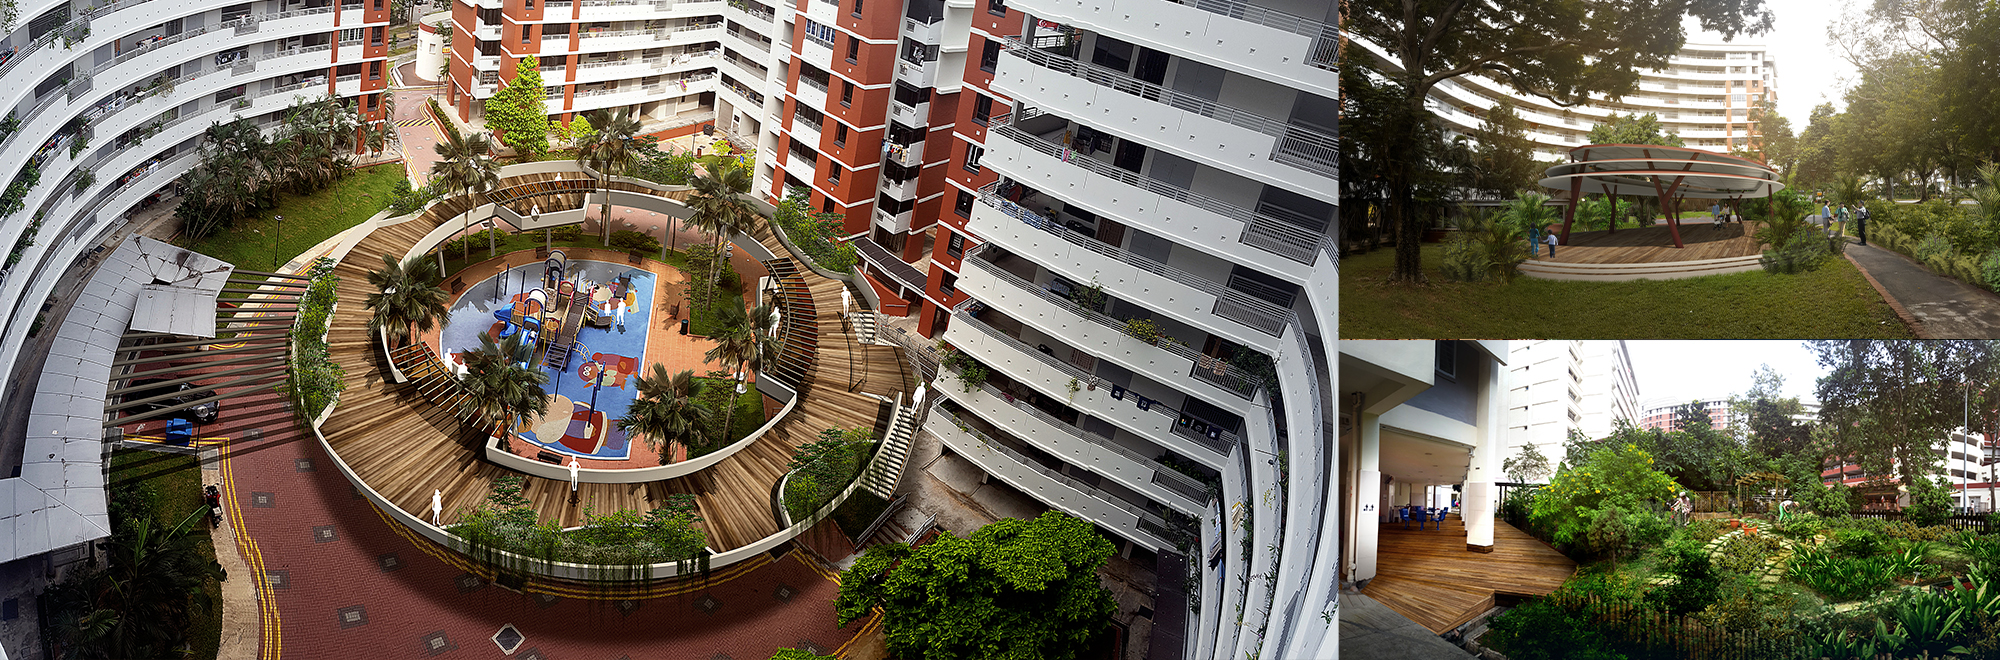
IMPRESSIONS : PINNACLE AT DUXTON
-this is an incomplete impression of the Pinnacle at duxton (4 of 8 towers).
-sketched in 120gsm paper using 0.2, 0.4 and 0.8 uni felt tip pens.
-colored in Photoshop
-14nov2015
CONCEPT : LIFE IN MONO
-sketched in 120gsm paper using 0.2, 0.4 and 0.8 uni felt tip pens.
-annotated and colored in Photoshop
-13nov2015
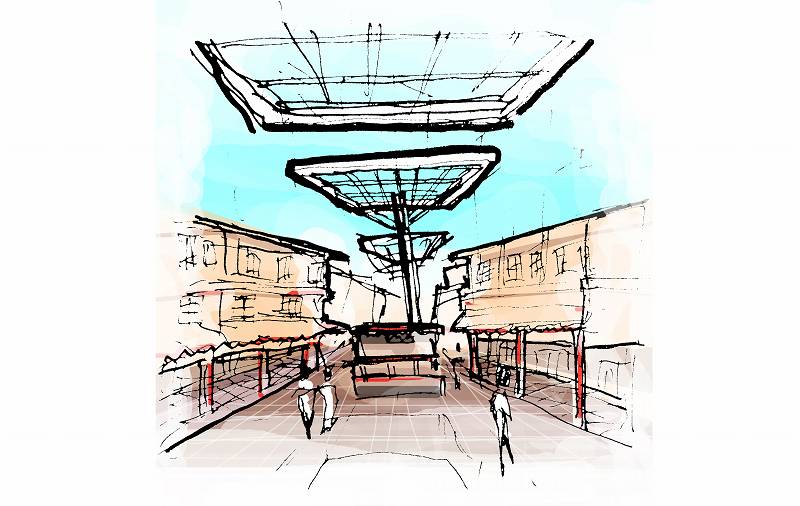
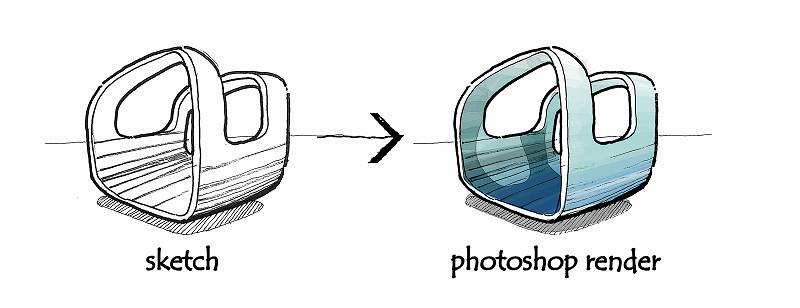
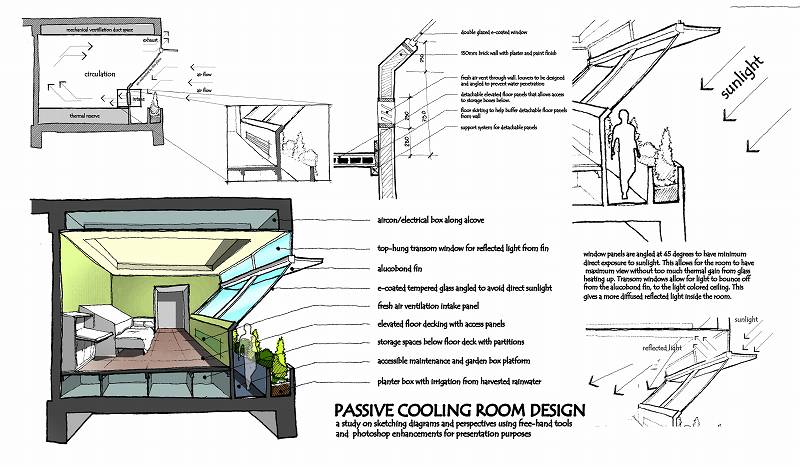
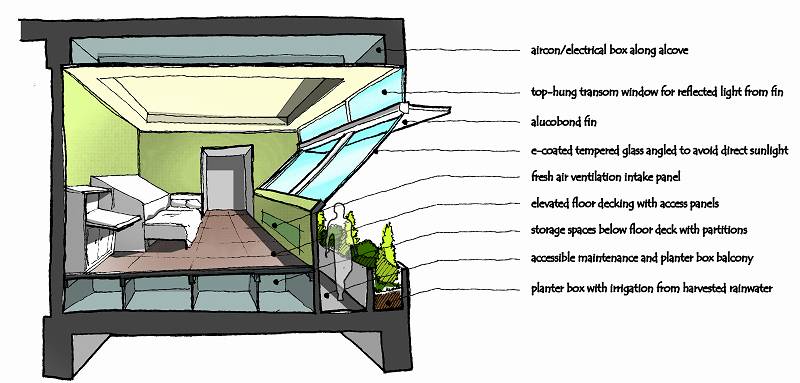
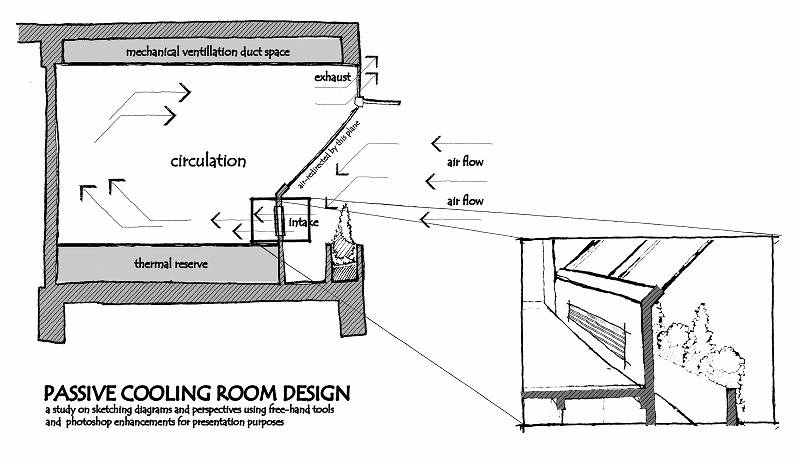
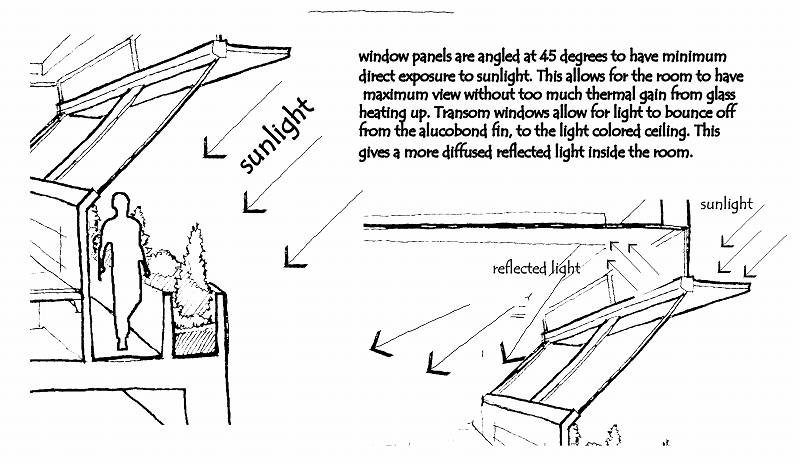
CONCEPT : PASSIVE COOLING ROOM WITH GARDEN
-sketched in 120gsm paper using 0.2, 0.4 and 0.8 uni felt tip pens.
-annotated and colored in Photoshop
-11nov2015
Sketching has never been my forte. Being born in the digital age, I have progressed mainly with the help of digital tools for drafting and modelling 3d. Once in a while, it pays to visit pen and paper. Studying spatial relationships with a pen poses a challenge for me. With the lack of ctrl+Z, you need to think faster than your hand can sketch. This is a good exercise and I plan on doing it more often.
Sketched with felt tip pen on medium thickness white paper
Colored and annotated in Photoshop
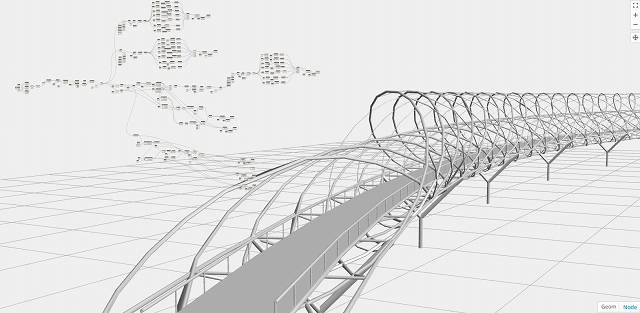
I started this modelling study with much enthusiasm, sustained it with an abundance of curiosity and finished it with great relief. With neither training nor knowledge on using Dynamo, I leapt right in armed with hours-upon-hours of reading and video materials contributed mainly by the scholastic generosity of people from world-wide-web.
I decided to use Singapore’s iconic Helix bridge as my platform for learning. I downloaded and studied plans, elevations and illustrations available online to get a better understanding on how the bridge was designed. The steps below does not aim to be a tutorial, but rather a means document my endeavors. There are far better methods and shorter ways out there that I for one am eager to learn. Just as well, this study does not attempt to copy every detail of the bridge, but only aim to model the general features of the bridge using the basic code blocks that I’ve learned in the process.
illustration taken from google image searchsimple section done in Autocad
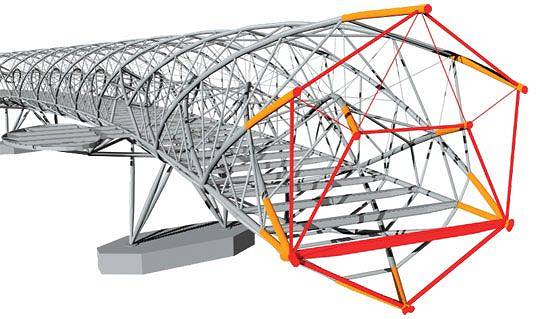
The bridge is composed of 2 major helix strands. The first strand is the outer shell which is circular in section. The second is an elliptical in shape embedded within the circle with half of it an overlapping arc with a portion of the circle.
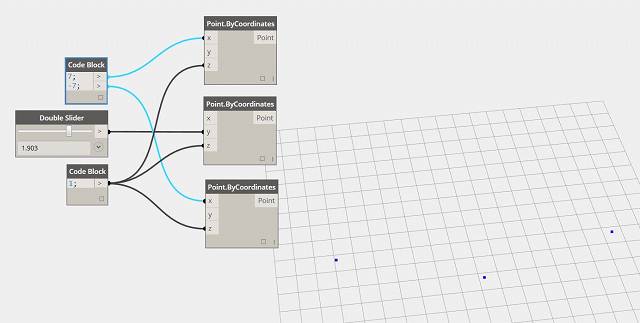
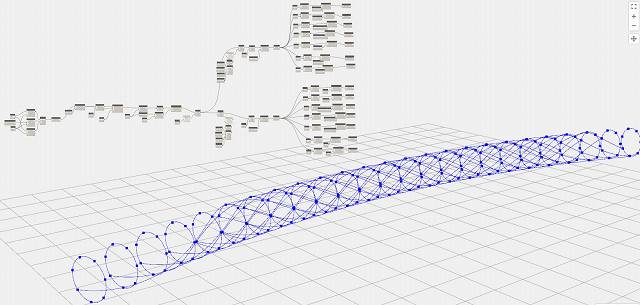
begin modelling with 3 independent point representing the middle and ends of the bridge. These 3 points can be manipulated manually even after the succeeding parts are put in place.
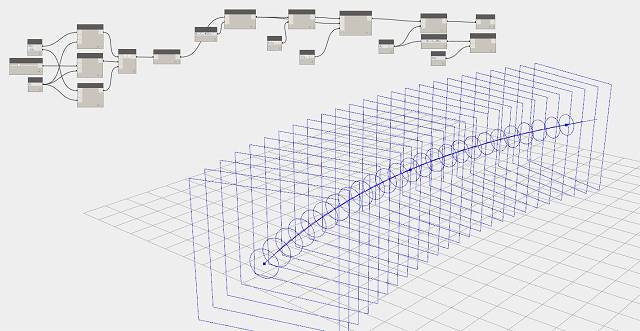
String a nurb.curve across the 3 points and use plane by parameter to generate a series of planes that run across the entire curve. These planes will be hosted on the curve therefore it will constantly adjust itself according to the curve profile. Using circle on plane radius, generate a series of circles on all planes.
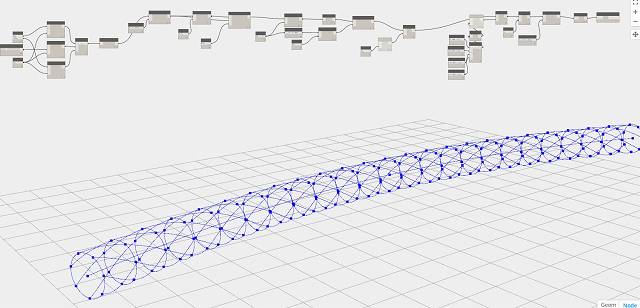
Generate points across all the circles using point parameter. Using shift index, I shifted each of the points grouped along the circle by one point at each step. This makes the points rotate around the circle by 1 index at each ring. Using list transpose, I am able to generate nurb curve across all points to create the helix above.
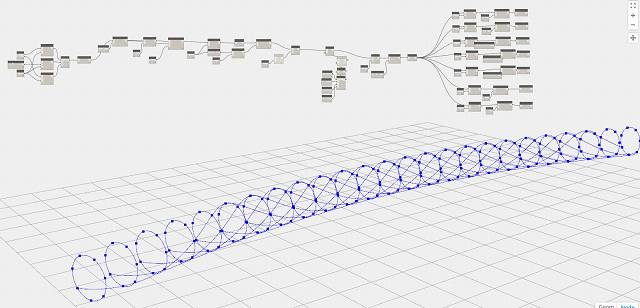
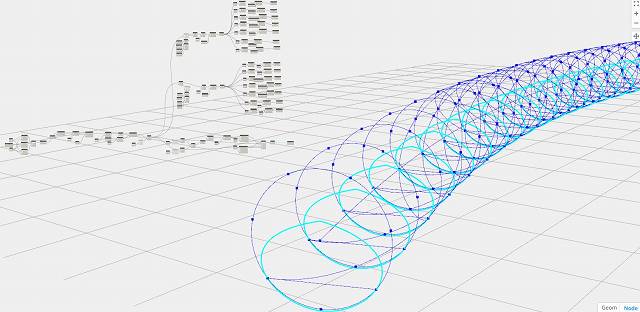
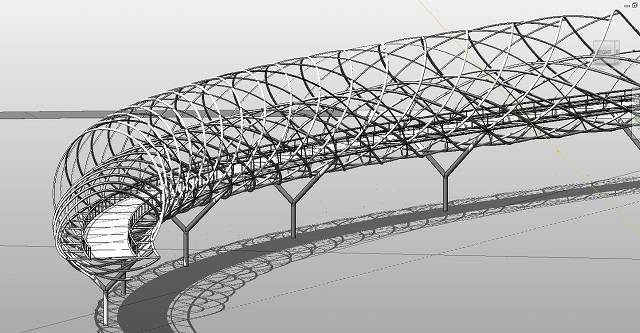
Now it’s time to carve out the ends of the helix. The Singapore helix terminates with its curve finally resting on the base of the curve. Using get index, select each curve and use remove items at index to take out points at the end of the helix .
Repeat the same process above but reverse the shift index. Once again, select each curve and remove the points to give the end its shape.
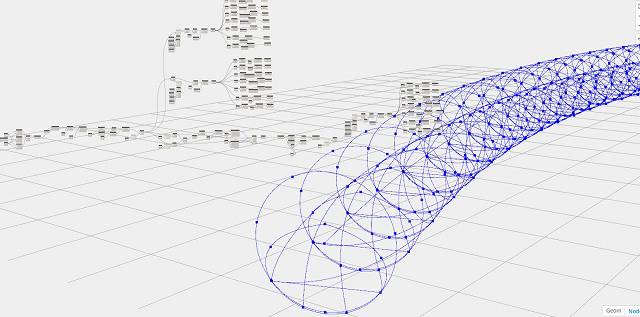
Create the minor helix strand using 2 of the points at the base of the major helix strand. Do this by translating the center points to create the top and bottom and then creating a list with it and the 2 basepoints. Use curve by point tool to generate the curve.
Using the same process above, generate points and run curves across these points. Trim the ends again to make the bridge termination.
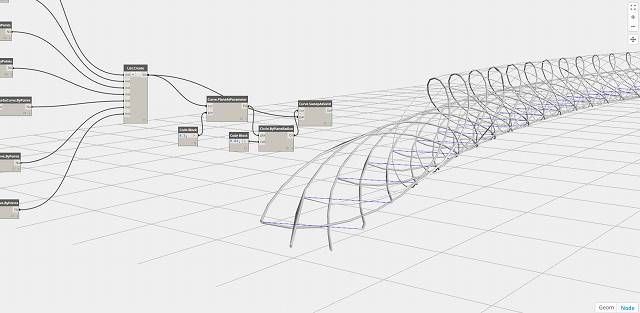
Generate 3d sweeps across the curves. In this process, I created planes parameter and set the parameter at 0.5. Created a circle on that plane and sweep it across the curve.
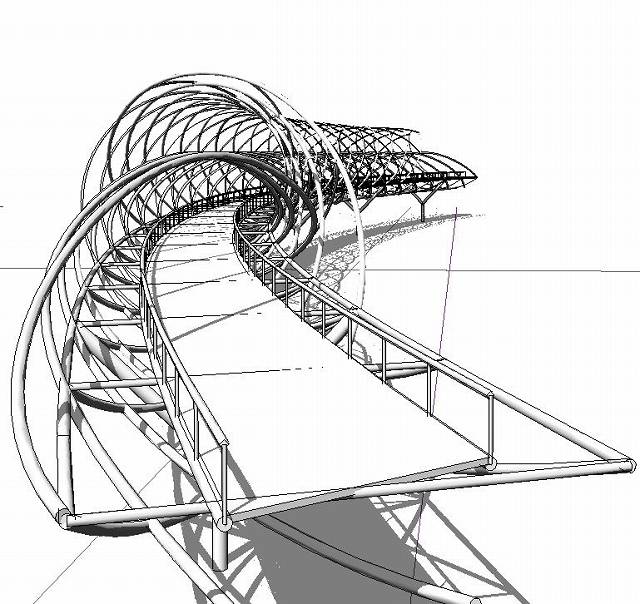
Now that the main helix is done, create the other accents to complete the bridge.
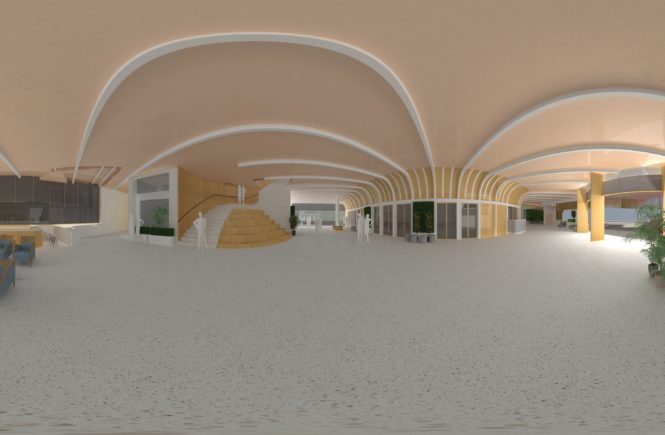
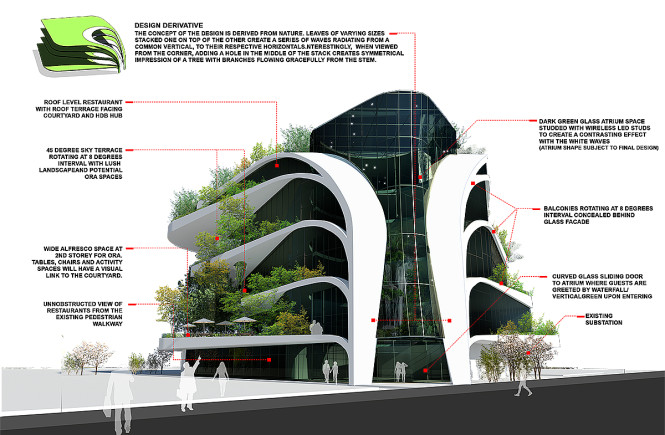
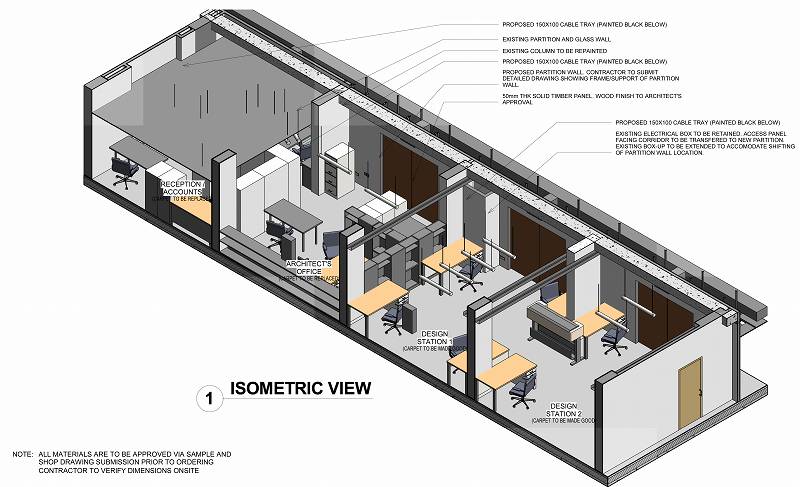
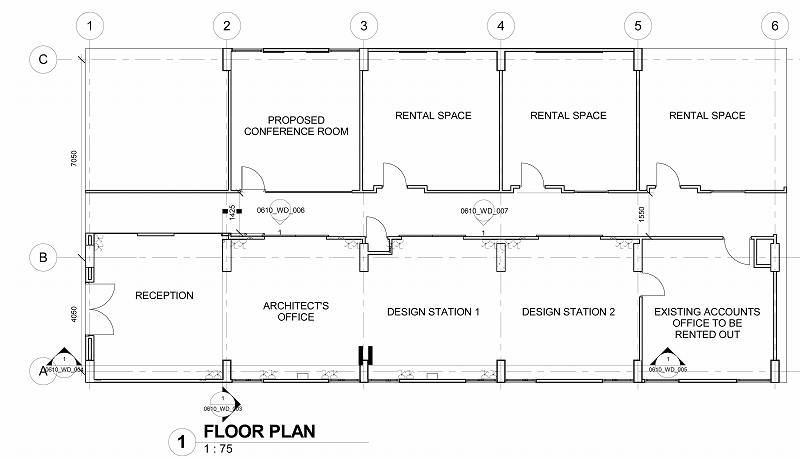
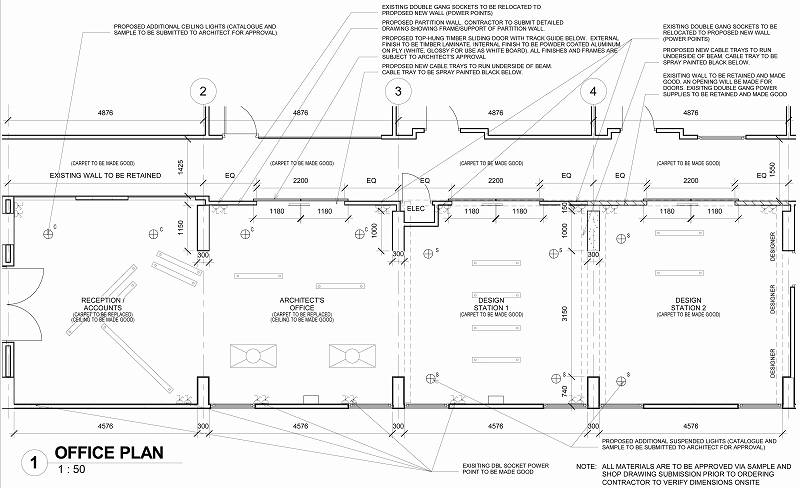
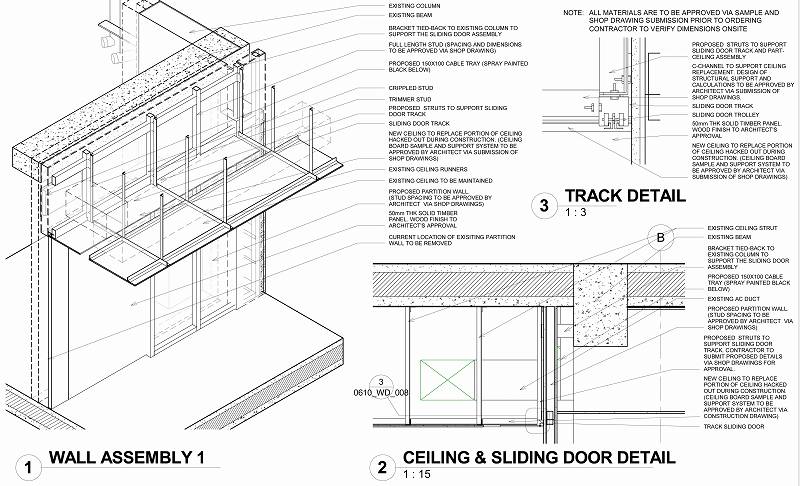
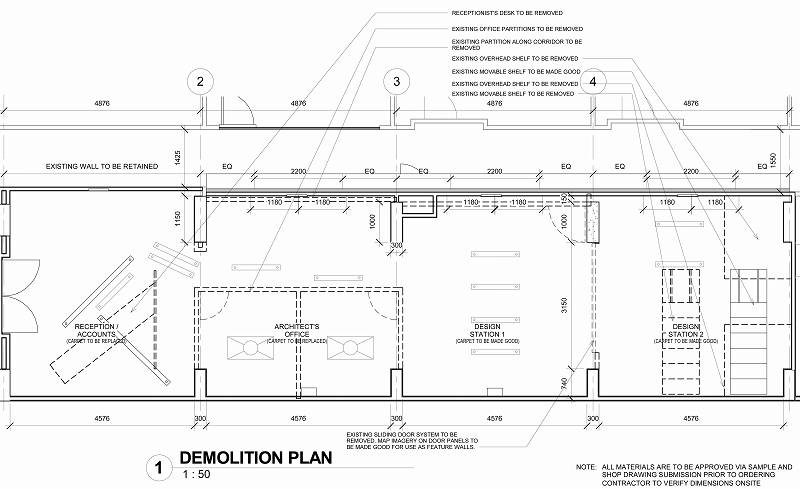
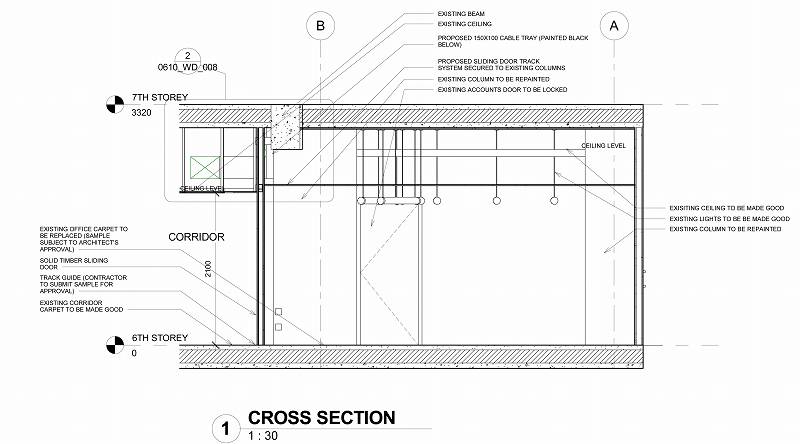
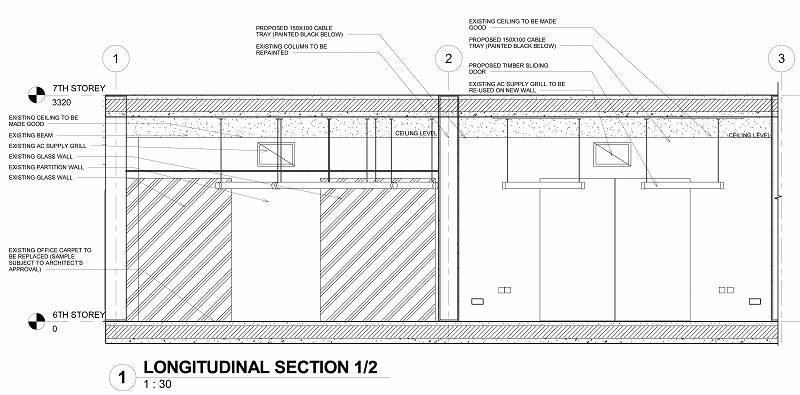
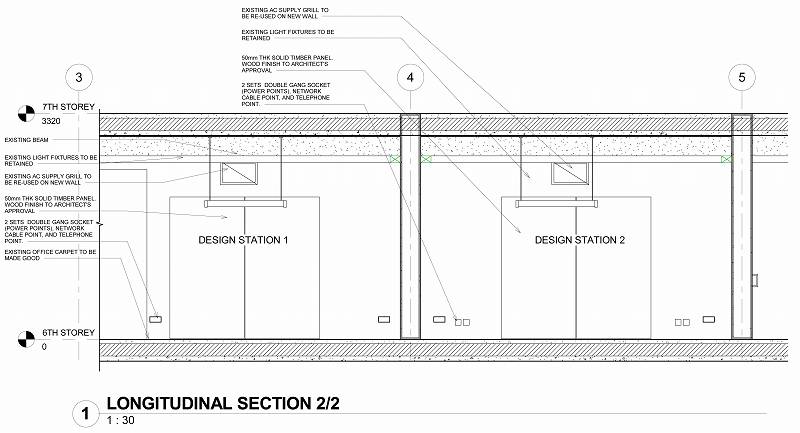
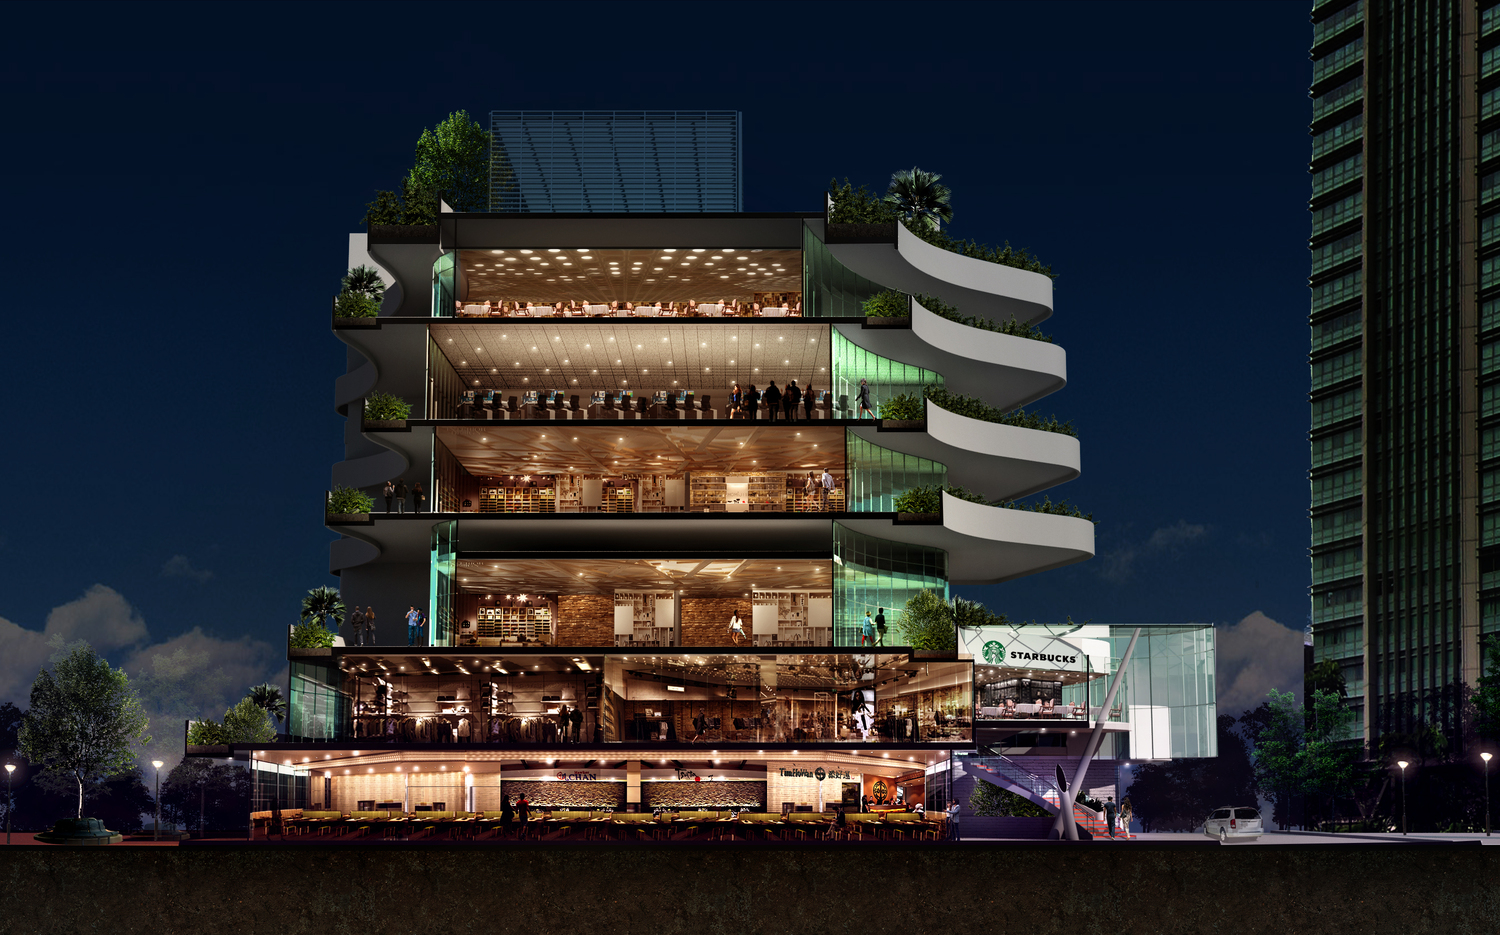
Revit is a powerful design visualization tool. But once in a while, I try to see just how much detailing I am capable of doing within its environment. Apparently, it can be as detailed as autocad too.
The illustrations and specs below are done entirely in Revit.
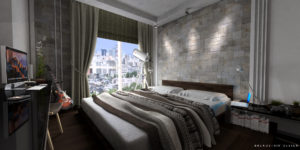
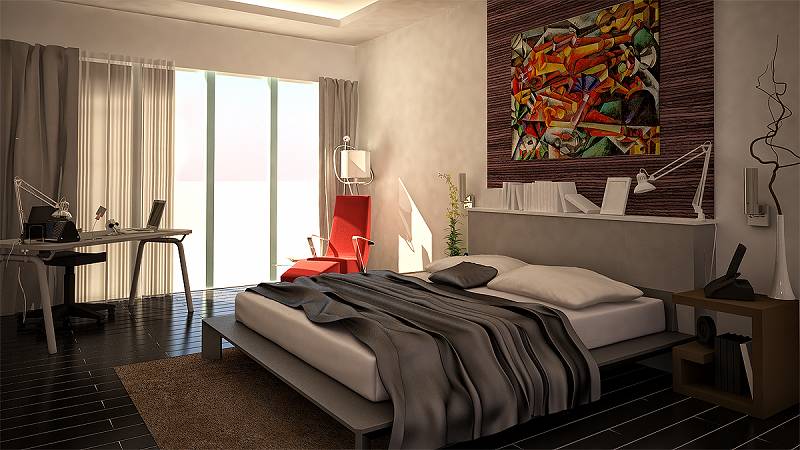
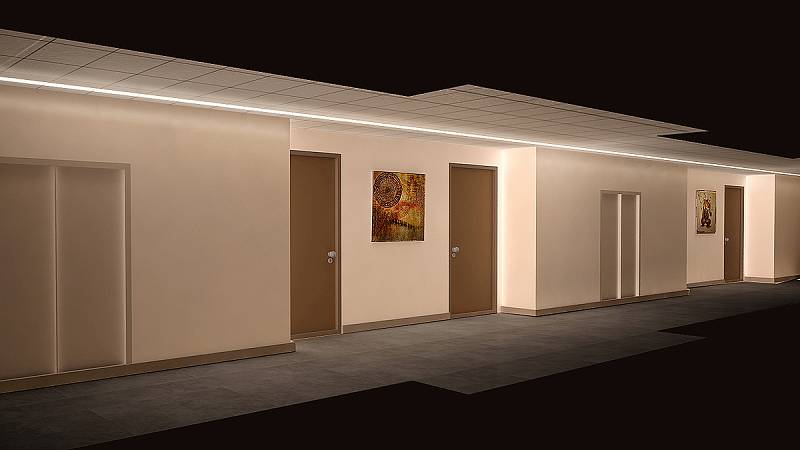
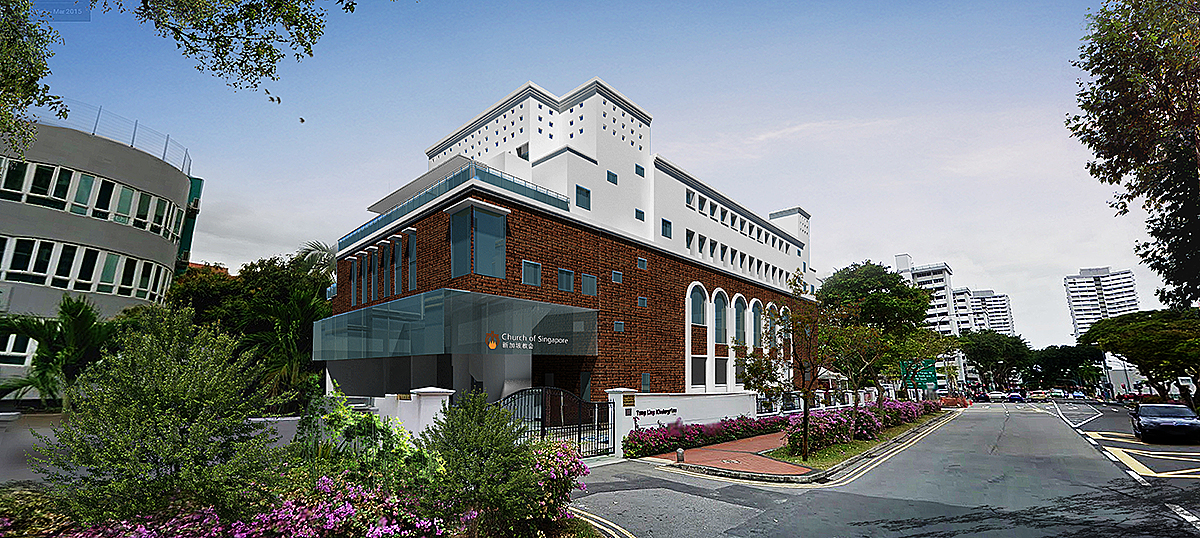
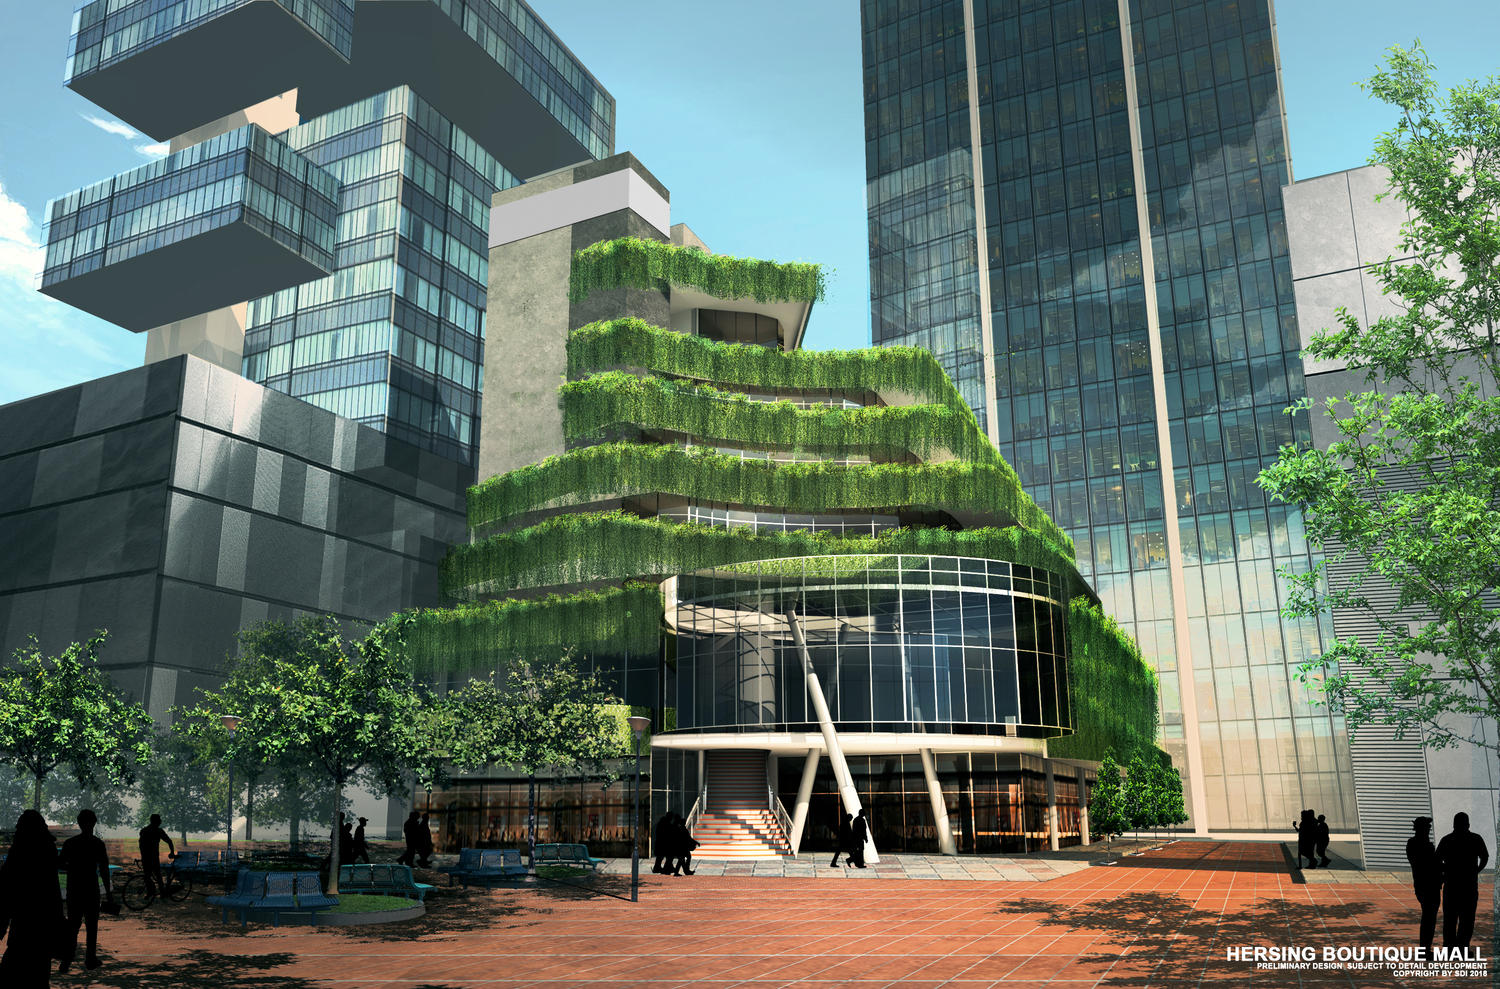
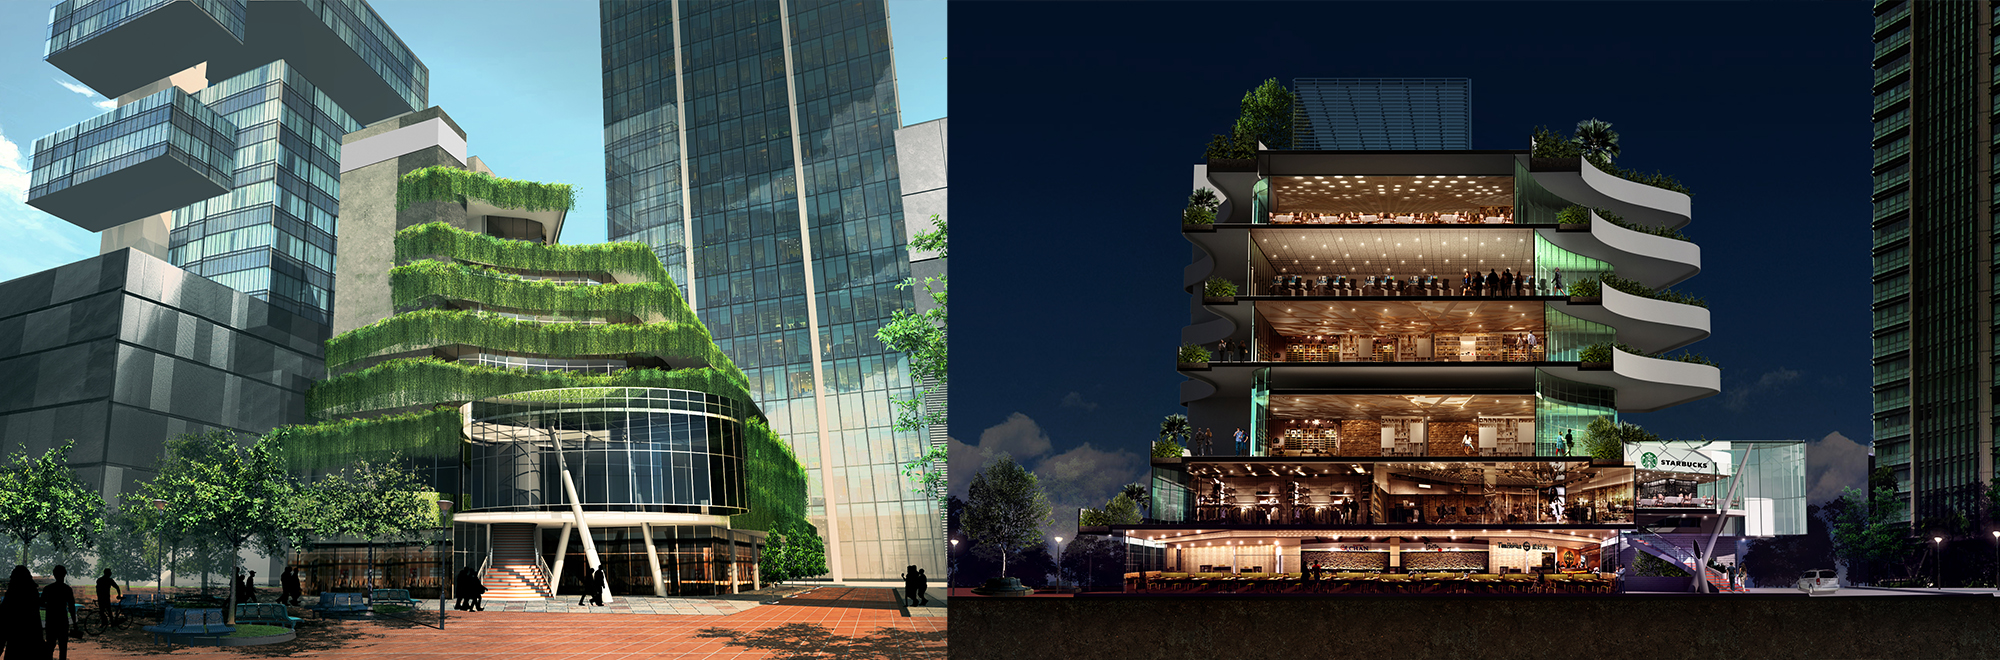
Some presentations are best done in 3d max. Although my skills in the rendering software need more polishing, I still think renders done in 3d max give a more professionally finished look compared to quick renders from sketchup or revit.


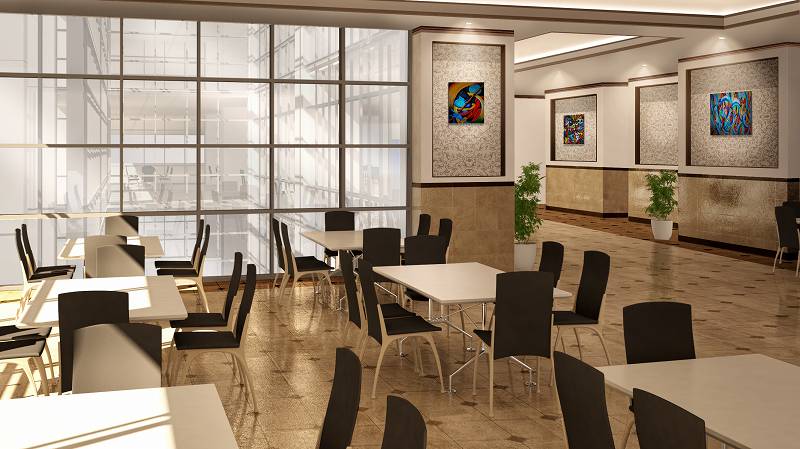
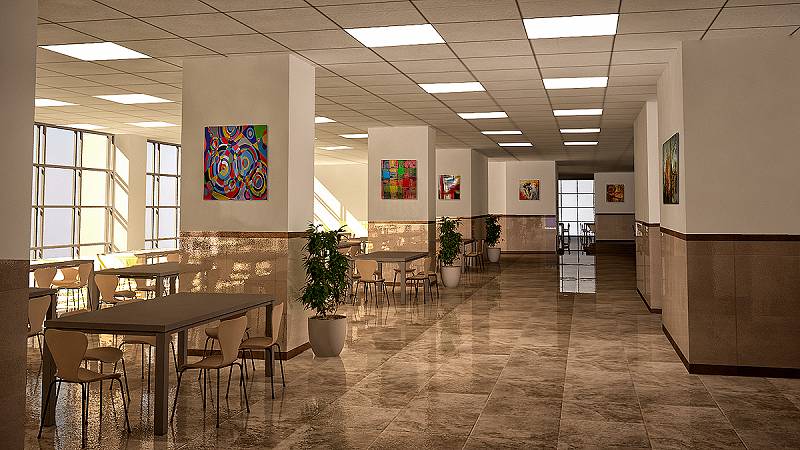

 HOTEL GRAND CENTRAL
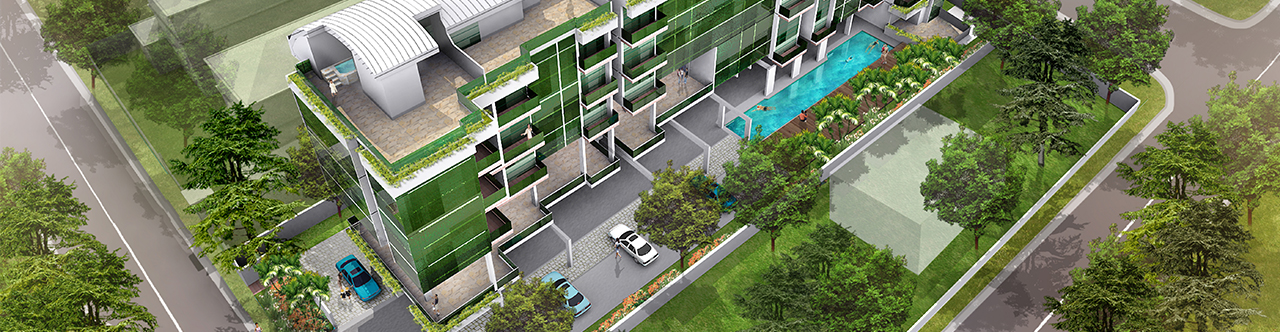 CEYLON COURT
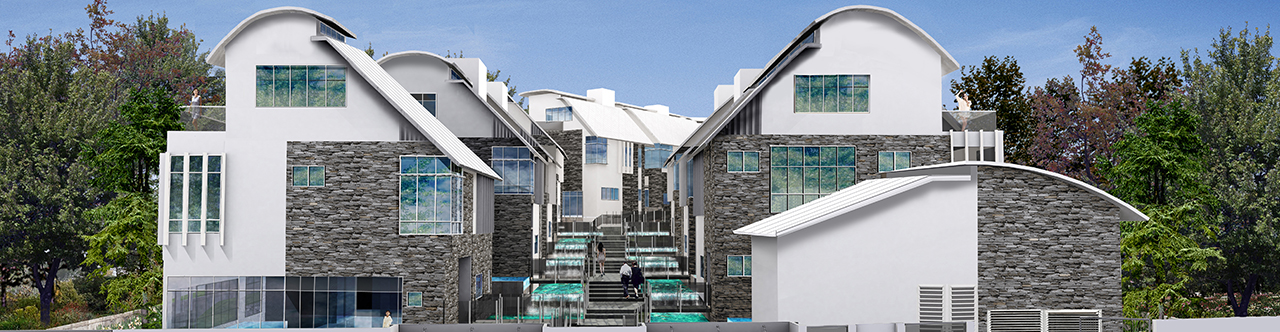